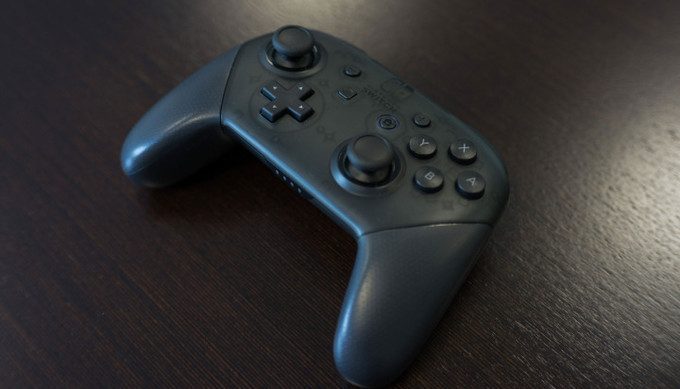
I believe everyone knows that the Nintendo Switch Pro Controller is one of the expensive gaming controllers in the current console generation.
However, it’s also complete, feels good to play with, has an excellent directional pad, and features impressive motion sensors and vibration tech. On top of that, the gamepad uses Bluetooth, so you don’t need an adapter to connect it with your computer.
The Pro Controller appears to Windows as a DirectInput controller rather than an XInput controller like the Xbox Series S/X and Xbox One gamepads, so it can be a bit of a chore to get it working with your PC games. Fortunately, Valve added full Switch Pro Controller support to Steam, so that probably covers a good chunk of your game library. Non-Steam games require additional steps that we’ll walk you through.
Connect Your Switch Pro Controller to PC With a Wired Connection

Plug your Pro Controller cable (or any USB-A-to-USB-C data cable, or USB-C-to-USB-C data cable if your PC has a USB-C port) into the controller.
Plug the other end of the cable into your PC.
That’s it! The controller will be detected by Windows 10 as “Pro Controller.” You can move on to Steam setup steps below.
Connect Your Switch Pro Controller to PC With a Wireless Connection
You need a Bluetooth adapter or onboard Bluetooth for this, but it’s also easy.
With the Pro Controller charged, press and hold the Sync button on the top of the gamepad for a few seconds until the indicator lights start flashing.
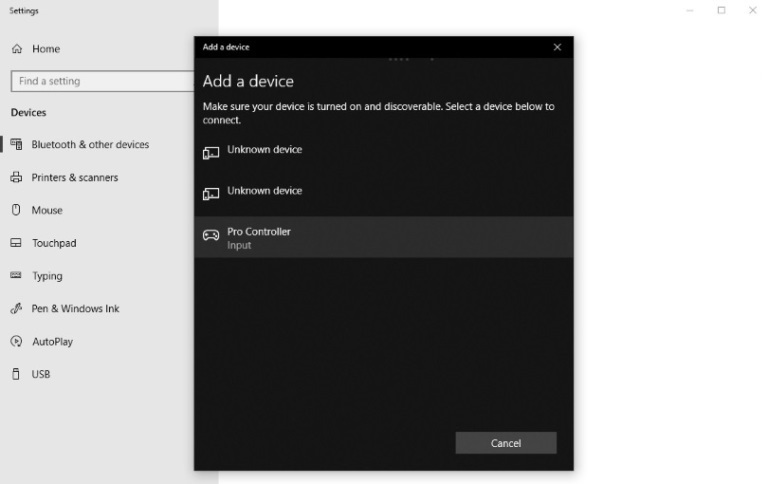
Open the system tray and right-click the Bluetooth icon.
Click “Add Bluetooth Device.”
Click “Add Bluetooth or other device.”
Click “Bluetooth” (because Windows 10 needs to be reassured that you want to use Bluetooth).
The Pro Controller should show up on the list of available devices (if it doesn’t, make sure the indicator lights are still flashing back and forth). Click it, and pair the controller.
Now you can move on to Steam setup.
Steam Setup
In order to make sure everything works as it should between the Pro Controller and your PC game, you should use Steam’s Big Picture mode, the couch-friendly lean-back menu system that works well with a gamepad.
If Steam doesn’t open automatically into Big Picture when you connect the Pro Controller, open Steam and enter the Settings menu.
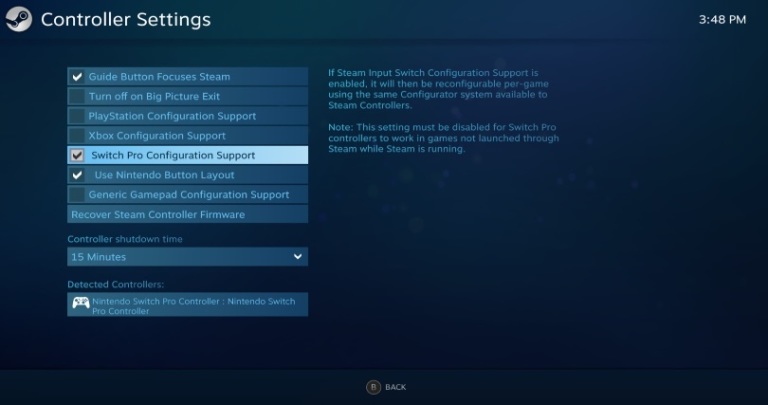
Click General Controller Settings, which opens a full-screen, Big Picture window.
Click “Switch Pro Configuration Support.”
If the Pro Controller is connected, the mouse cursor should disappear and you should be able to navigate Big Picture with the gamepad. You can toggle “Use Nintendo Button Layout” depending on whether you prefer the A/B/X/Y buttons to be mapped as they are on the Pro Controller, or as they’re mapped on an Xbox controller.
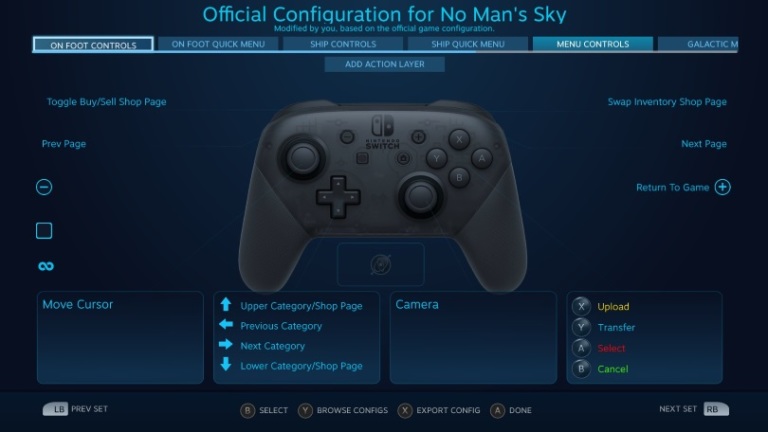
Using Big Picture ensures that Steam’s controller support and over-the-game remapping and configuration options appear as they should, which won’t likely be the case if you open a game from the desktop. This happened when we played No Man’s Sky; the controller worked with the game through Big Picture, but the mapping was strange when launched through the desktop.