How can HomePod be shared with family and friends to have control permissions? In fact, HomePod can not only be used to play music and chat with Siri, but also allow family or friends to play the music they want, or directly play it through third-party music apps such as Spotify and KKBox. Let me tell you how to set it up.
Invite others to realize HomePod shared family control
Maybe there are many users at home who want to use HomePod to control HomeKit products such as home lighting and temperature, or even want to use third-party music playback software to directly play music through AirPlay, then they must be invited to have the authority to control HomePod.
Shared family control permission conditions
- Invitees need to have an iPhone, iPad, or iPod touch updated to the latest version of iOS, or a Mac updated to the latest version of macOS.
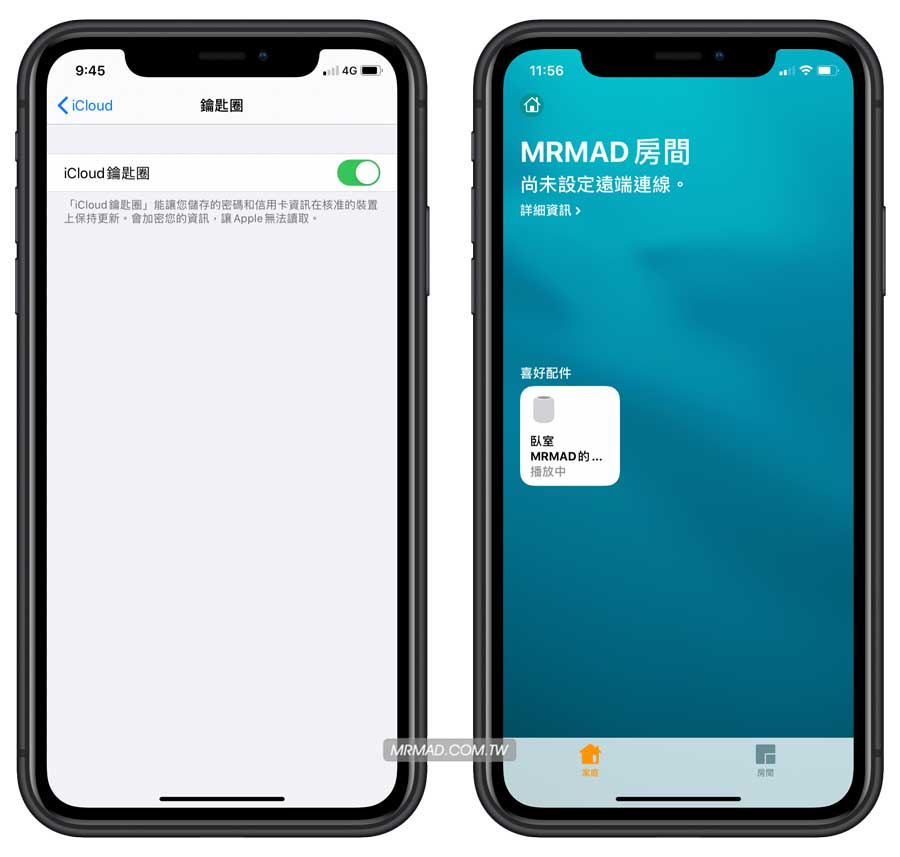
- Make sure you and your invitee have signed in to iCloud on your iOS device or Mac, and turn on “Family” in “iCloud Settings”.
- To invite others to control your home devices and edit their permissions when you are not at home, you need to set HomePod, Apple TV, or iPad as a home hub. If you haven’t set up a home hub, you must be at home and connected to your home Wi-Fi network to invite others.
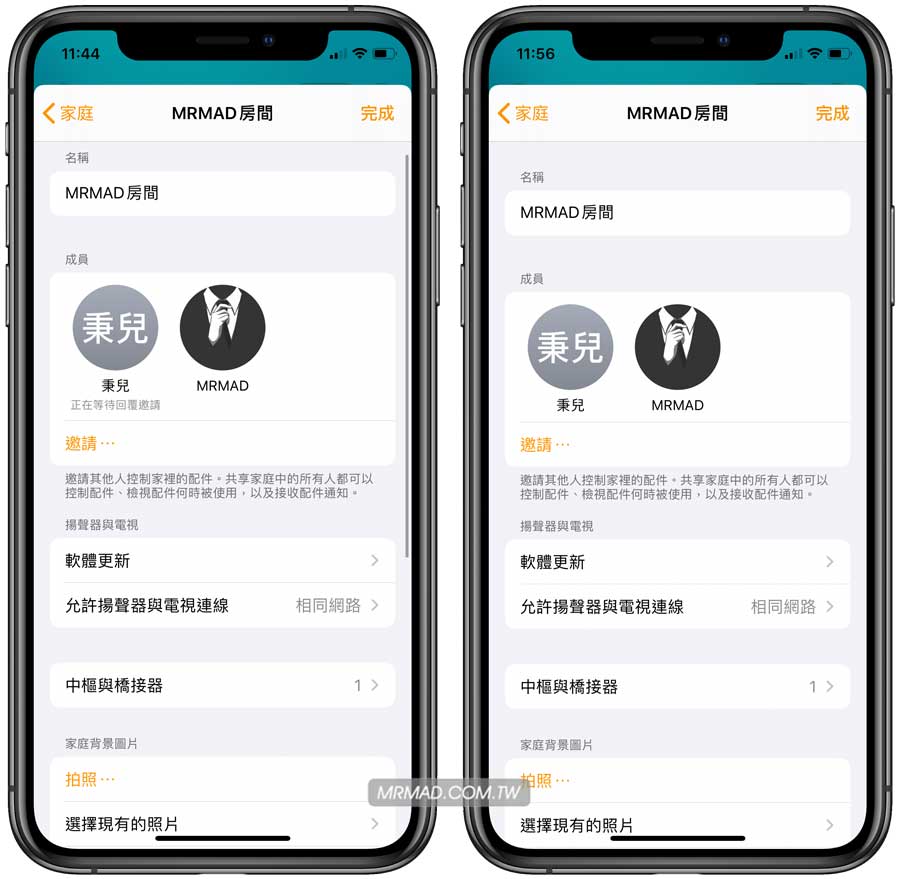
Step1
Open the “Family” app, click the “House” icon in the upper left corner, and click “Family Settings”, in the family menu, click the setting option of the current HomePod. For example, my HomePod has been set in the MRMAD room, just click the “MRMAD room” option.
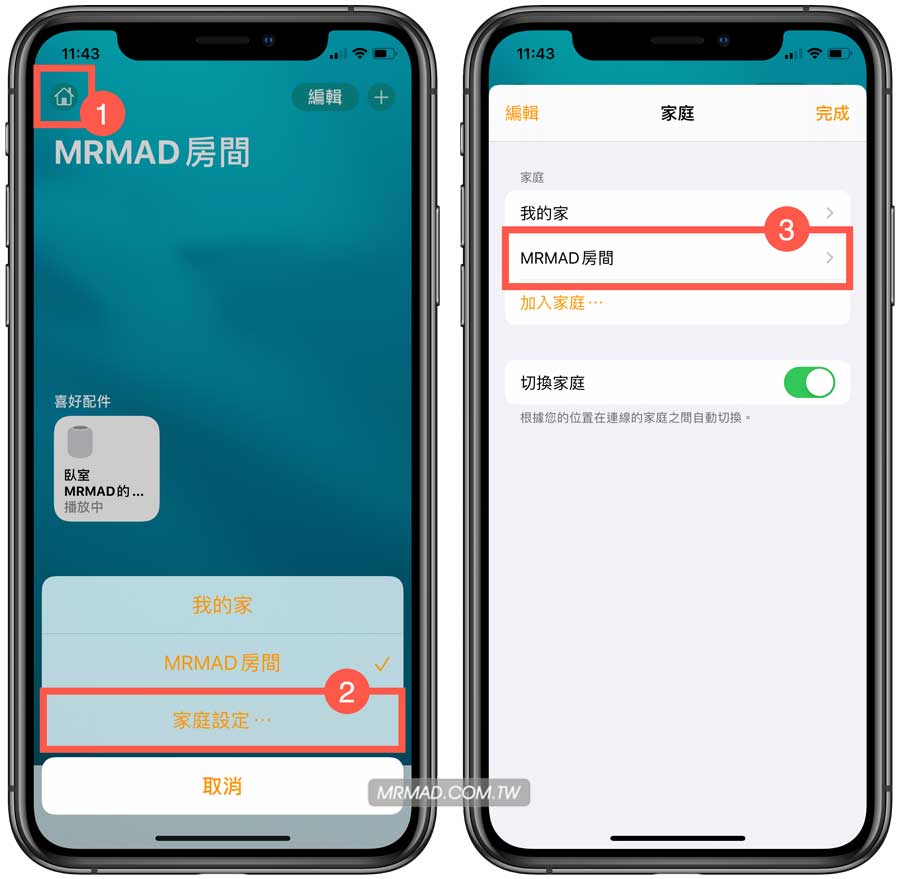
Step2
When entering the settings page, you can click “Invite” from the member section and invite others to join. You can find the other party by searching and click “Send Invitation”.
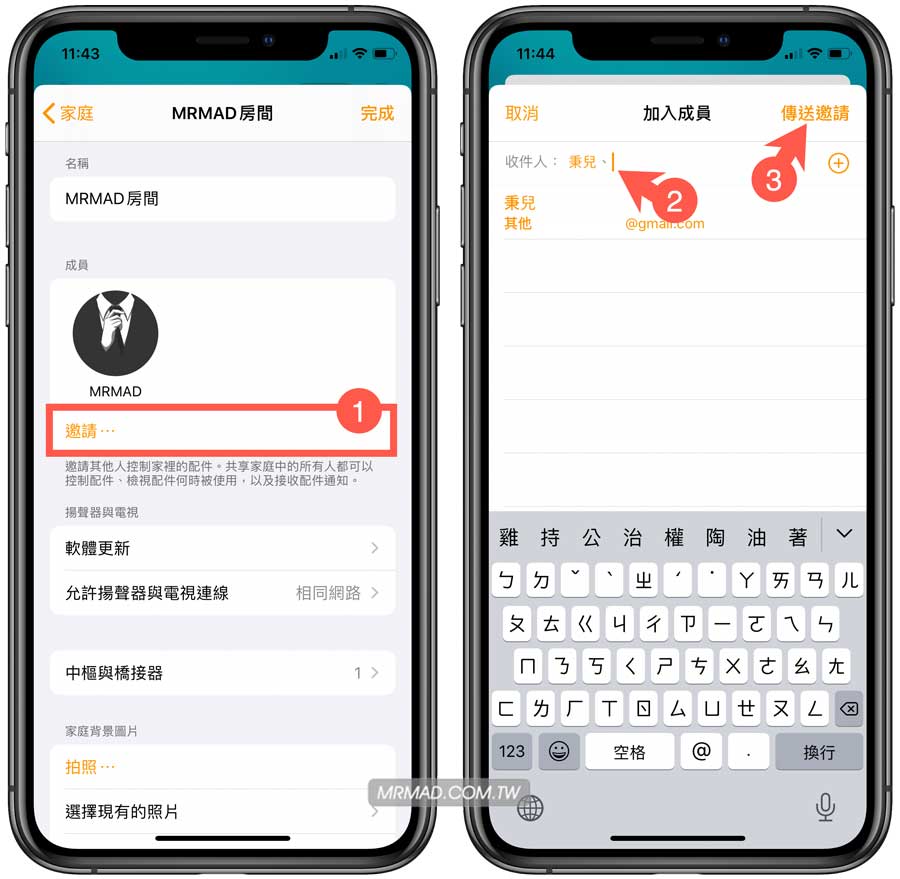
Step3
You will see the status of waiting to respond to the invitation in the member list, and if the other party agrees, the status shown on the right will appear.
Inviting party screen
The other party’s iPhone will receive an invitation to join the screen sharing this family’s control of this home accessory, click “Agree”> “Continue”.
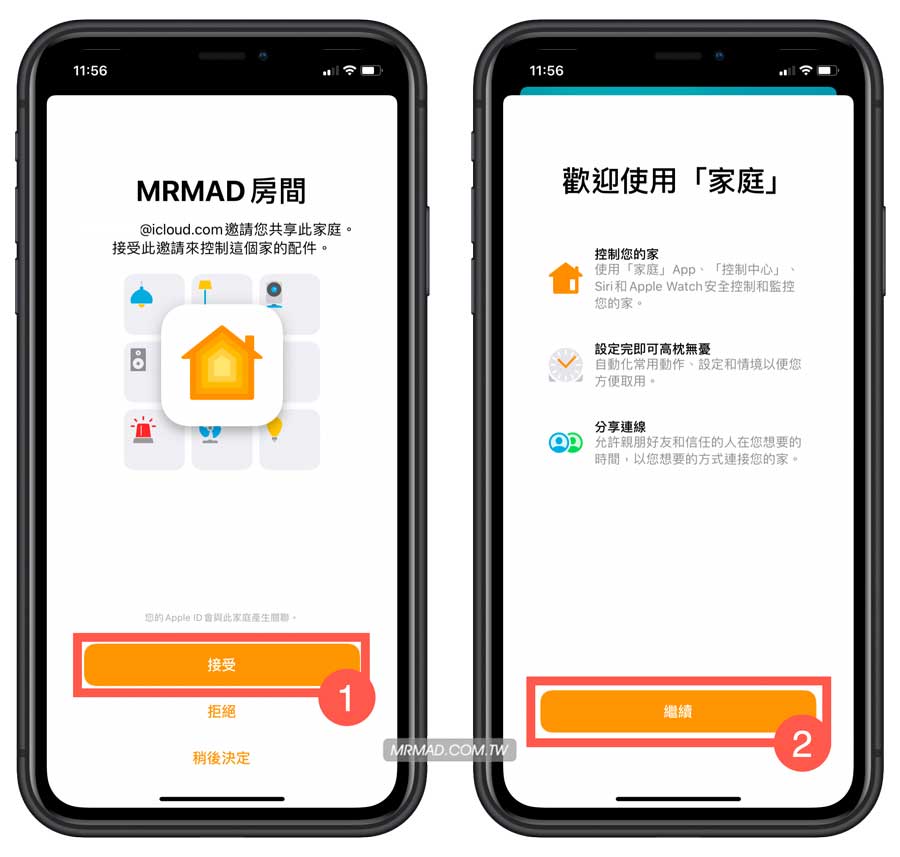
At the same time, if you want to enable it, you will be asked to turn on the “iCloud Keyring” function, otherwise, you will not be able to join. When the joining is completed, you will see the right screen, allowing this device to directly control and play HomePod music.
How to set the HomePod to recognize the voice of family members
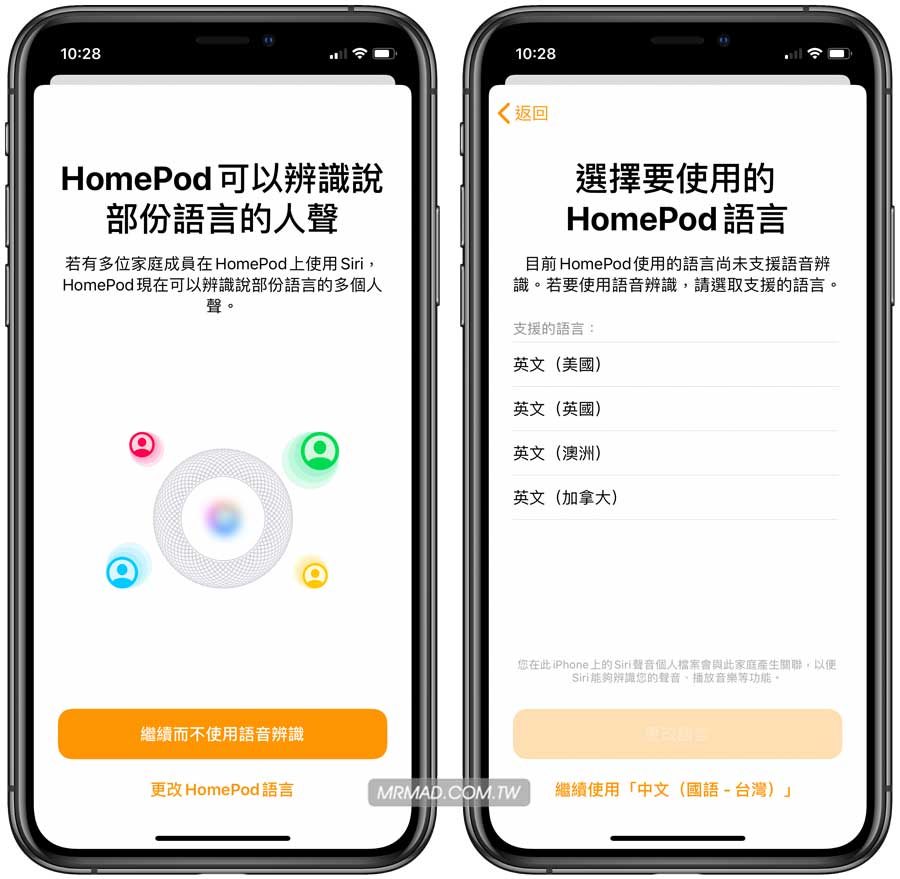
In iOS 13.2 and above, the voice recognition of family members has been added, but how to turn on this function? Click the member’s photo to take it in, and turn on the “Recognize My Voice” function.
After opening, it will display “Continue without voice recognition”? As a result, there is no way to open the recognition of human voices. This is because this function does not support the Taiwanese language family. It is still in the development stage. At the time of writing this article, only four countries, the United States, the United Kingdom, Australia, and Canada are open.
Wouldn’t it be nice to be able to switch languages? Unless you want to use Siri throughout the conversation in English, of course, you can switch to another language, otherwise, you can only wait for the traditional Chinese language to complete!
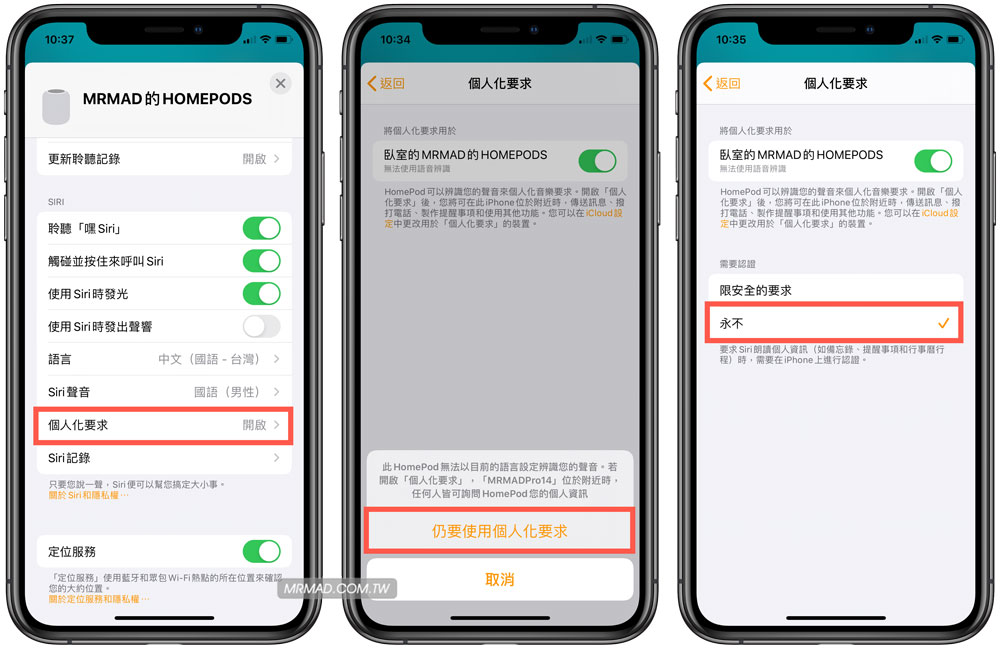
Turn on HomePod personalization request settings
It’s okay if you can’t turn on the voice recognition of family members, but there is still a feature that can be turned on. This feature is a “personalized request” that can use Siri to read personal information, such as memos, reminders, and calendar itineraries.
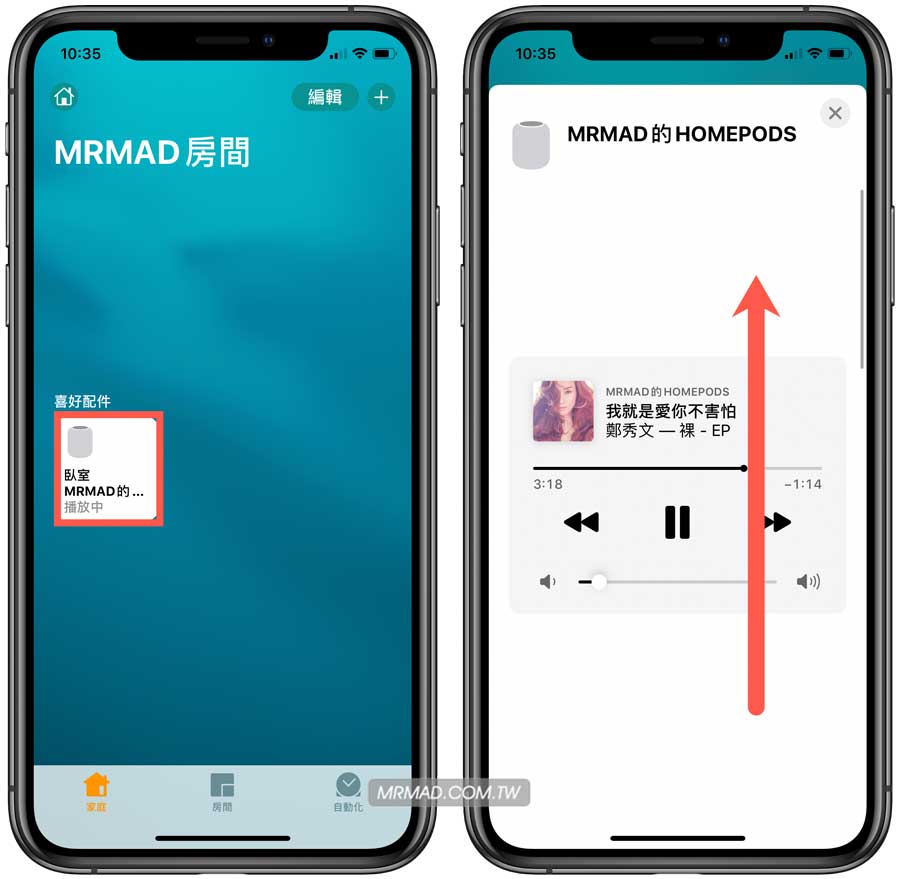
Open the “Home” app, press and hold the “HomePod” button, and swipe up.
Click “Personalization Request” and turn on the personalization switch, and it will pop up that HomePod cannot recognize your voice in the current language setting. If you want to turn on this feature, you may be able to use Siri to know today’s itinerary along with your family or friends. Just put it in the room and use it by yourself. You don’t need to worry about it. After opening it, set it to “Never”. If you are worried that your family will know the itinerary, you can set it to “Safety only requirements.
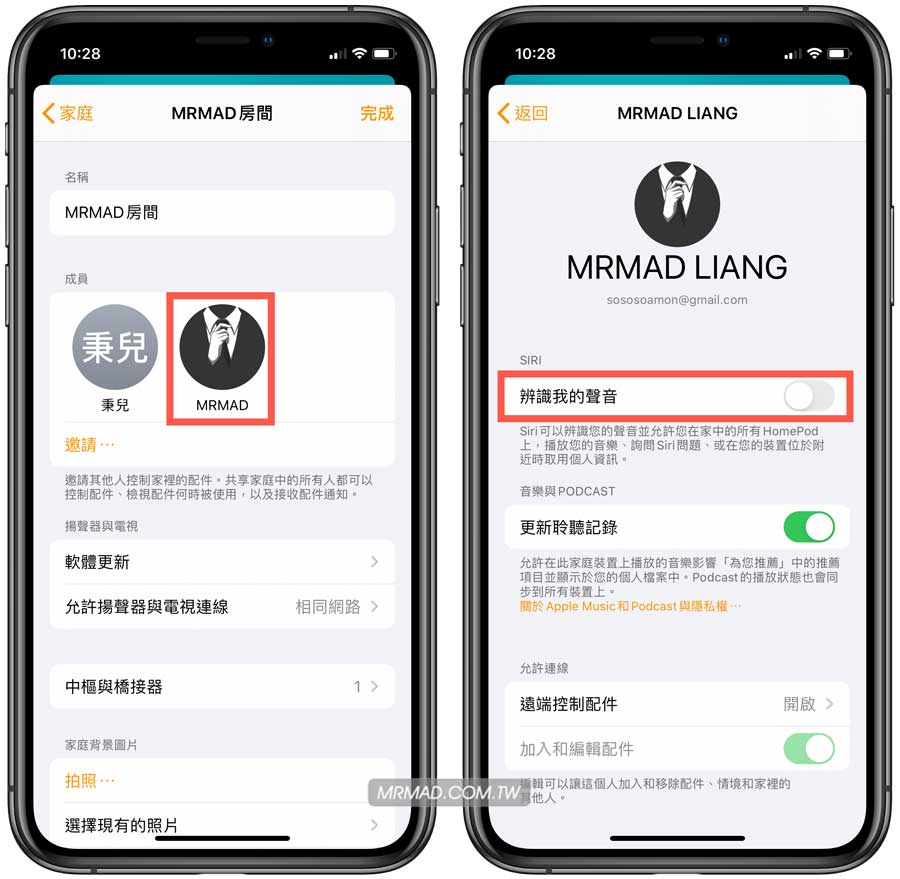
Improve the security of HomePod and set who is allowed to control remotely
Maybe after you add friends to control HomePod permissions, don’t forget that the default function is to allow friends to connect back to the HomePod remotely to control the music, lights, and HomeKit devices at home. How do you prohibit them from having these permissions?
You can go to the HomePod settings page, click the photo of the other party, and turn off the “Add and edit accessories” function. In addition, click on the “Remote control accessories” and turn off the “Remote control accessories” function.

The above is the control skill function of multiple family members of HomePod this time. If you have more questions, you can also tell me through the message below. We will share more HomePod skills with you in the follow-up.