Modern drives have one feature called S.M.A.R.T. (Self-Monitoring, Analysis, and Reporting Technology), which monitors different drive attributes in an attempt to detect a failing disk. That way, your computer will automatically notify you before data loss occurs and the drive can be replaced while it still remains functional.
In Windows, you can manually check the S.M.A.R.T. status of your drives from the Command Prompt. Just type “cmd” into the search bar and open the application. In the pop-up box, run:
wmic diskdrive get model,status
It will return Pred Fail if your drive’s death is imminent or OK if it thinks the drive is doing fine.
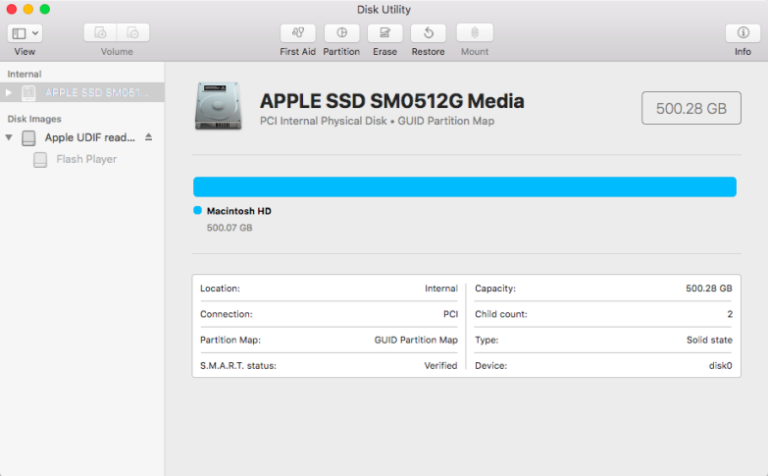
On a Mac, open Disk Utility from /Applications/Utilities/, click on the drive, and look at S.M.A.R.T. Status in the bottom left, which will either read Verified or Failing.
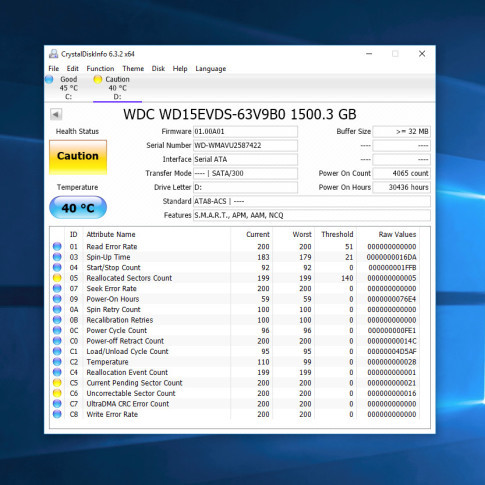
However, this basic S.M.A.R.T. information can be misleading. You only know when your drive is near death, but you can start to experience problems even if the basic S.M.A.R.T. status is okay. For a closer look, I recommend downloading CrystalDiskInfo for Windows, or DriveDx for macOS, both of which will offer up more detailed S.M.A.R.T. information than your computer provides on its own.
Instead of saying your drive is “OK” or “Bad,” like the built-in tools do, the CrystalDiskInfo and the DriveDx also get more intermediary labels, like Caution or Warning, respectively. These labels apply to hard drives and SSDs that are starting to wear down, but aren’t necessarily on their deathbed.