Move Album
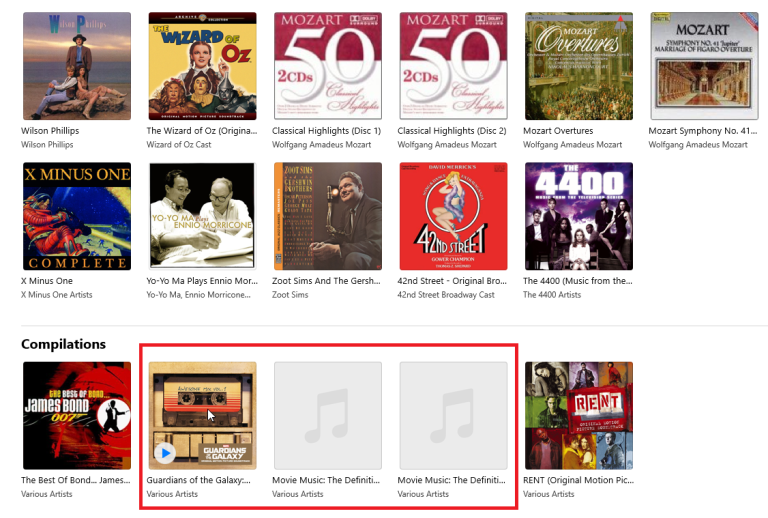
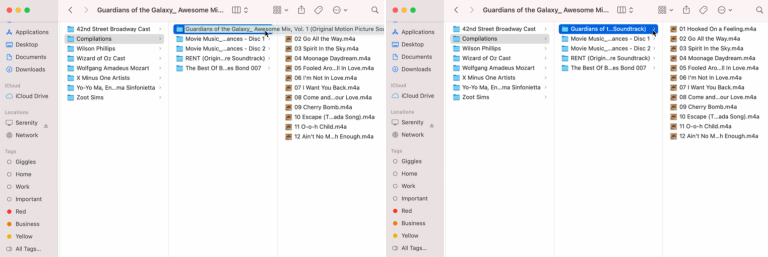
Let’s say the album in question is a compilation with songs by different artists. If it’s a new addition to your library, you can easily find it in the Recently Added section. Otherwise, scroll down to the bottom of the music library to find it under the Compilations section. The artist’s name will probably be listed as Various Artists. Maybe you’re okay with that, or maybe you’d rather set up the album under a less generic name and location.
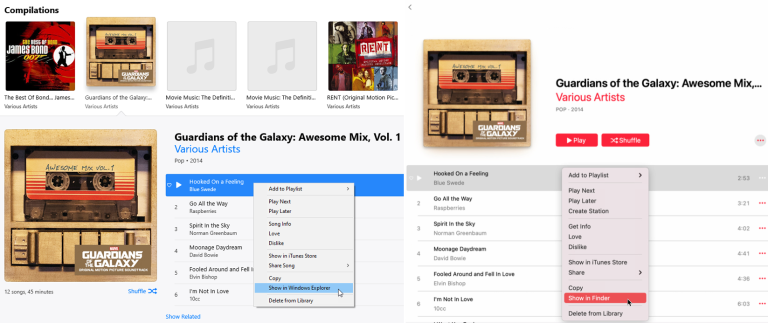
First, let’s move the album itself out of the Compilations folder on your computer and into a more specific and suitable folder. In iTunes or the Music app, click on the album to reveal all the songs inside. Right-click on the first track. From the pop-up menu, click on Show in Windows Explorer/Show in Finder to open the Compilations folder on your computer.
Now we’re going to create a new folder for the music. If you’re using Windows, go to the Music folder under iTunes Media in File Explorer. Mac users should go to the Music folder under Media in Finder. Create a folder with the name of the artist or artists that you want to use for the album.

If the album is performed by different artists and not one main singer or group, you may want to include the name of the album itself in the folder. For example, I downloaded an album of songs from the Guardians of the Galaxy films, all by various artists. So I simply created a new folder named Guardians of the Galaxy Artists.
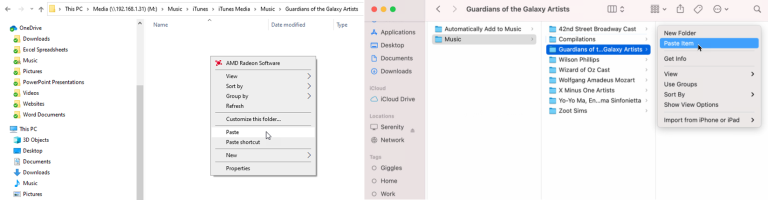
Go back to where the album is stored in File Explorer or Finder. Right-click on the album and select Cut or Copy from the pop-up menu. Open the newly created folder and paste the songs into their new destination.
Delete Album
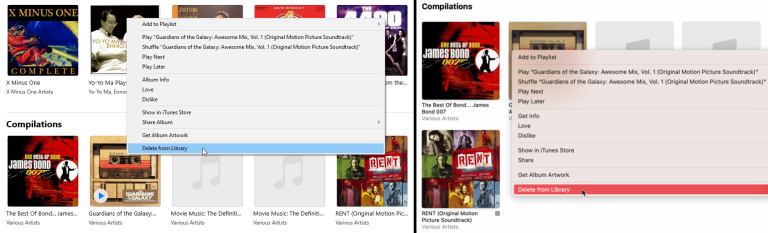
Now it’s time to delete the album’s original location. Right-click on the album inside iTunes or the Music app. From the pop-up menu, select Delete from Library. You’re asked if you’re sure you want to delete the selected songs from your library. Click the Delete Songs button.
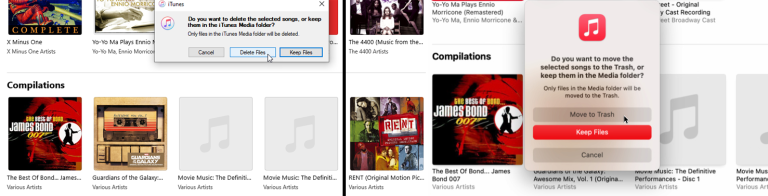
If you opted to copy the album rather than cut it, you’re then asked if you want to delete the selected songs or keep them. Click the button to Delete Files in Windows or Move to Trash on the Mac. The album disappears from the app. But don’t worry, the songs still exist in your newly created folder. We’re going to bring the album back using that folder.
Import Album
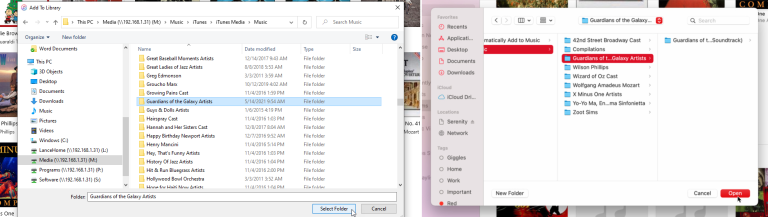
You can now import the music inside your newly created folder. In iTunes, go to File > Add Folder to Library. If you’re using the Music app, go to File > Import. Find the folder and click Select Folder to add the album into iTunes or the Music app.
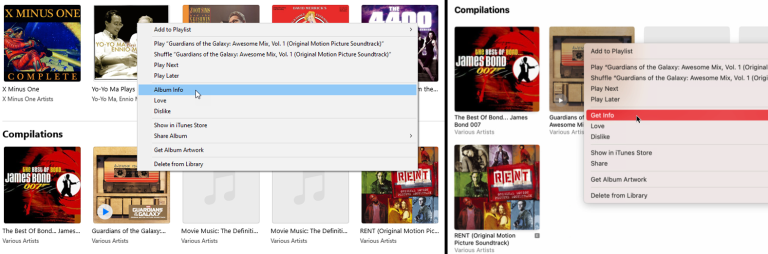
You may notice that the songs are still appearing in the Compilations section with Various Artists as the artist name. This can be fixed, though. Scroll to the album, right-click on it, then click Album Info (iTunes) or Get Info (Music app)
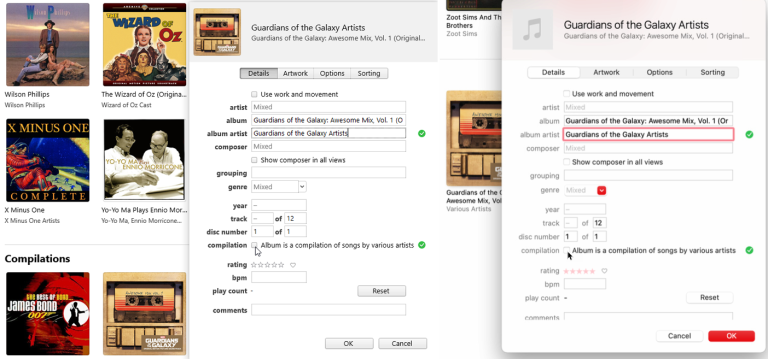
In the Details section, click in the field for Album Artist and change the artist name to the same name you previously used to create the new folder. You can change the artists of a compilation album to one name. For instance, I changed the album artist for the Guardians of the Galaxy: Awesome Mix Vol. 1 to say Guardians of the Galaxy Artists.
Find Missing Cover Art
Apple’s iTunes is usually adept at digging up the right artwork for albums in your library. Whether you purchase an album through iTunes or rip one of your CDs into your collection, Apple’s music player relies on a database called Gracenote to snag album artwork and other data.
But iTunes can get stumped if the album isn’t in the Gracenote database. In some cases, the wrong art appears. In other cases, no art appears. How do you then find the right cover art for your albums? You have a few options for iTunes or Apple’s Music app.
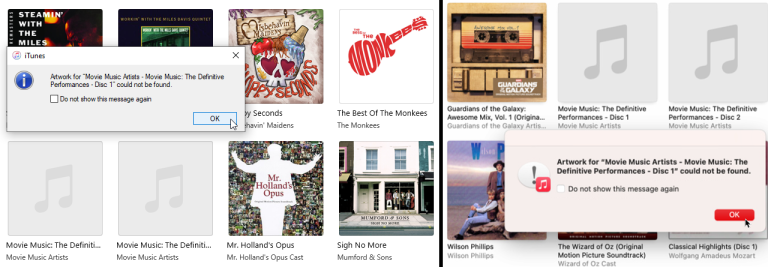
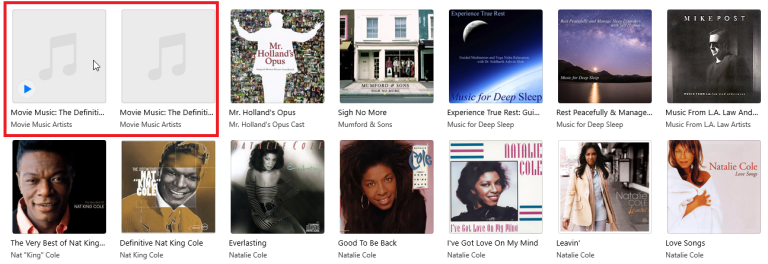
Right-click on an album without artwork. From the pop-up menu, click on the Get album artwork command. If the artwork is accessible, iTunes or the Music app will apply it to your album. If not, you’ll see the dreaded message: Artwork for [album name] could not be found.

If this happens, you can search for the right image art online, save a copy of the image file, then upload it into iTunes or Music. You can do this by searching for the album in question, switching to images in your search engine of choice, and finding a good image to use.
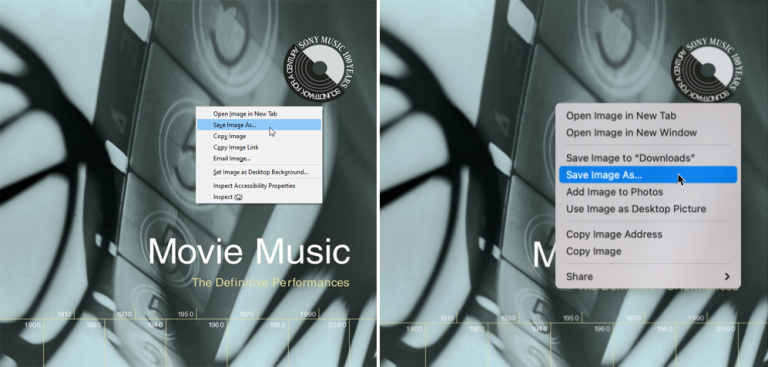
Click one of the images to display it in a larger format. Right-click on the larger thumbnail, then right-click the pop-up menu and click Save image as. You can then save, and even rename, the file. Be sure to save the file as a JPG or other common image format. If it’s a .webp file, for example, you must convert the image before uploading it again.