Hey, please imagine, if you have two separate Gmail accounts, each with its own email address, contacts, and calendar. After trying to juggle both, you now want to merge them into one single, more manageable account. What will you do next step?
Here comes the way:
Your first step is activating email forwarding. To be simple, I would mention the account you wish to actively use as your new account and the one you no longer plan to actively use as your old account. Sign into your old Gmail account.
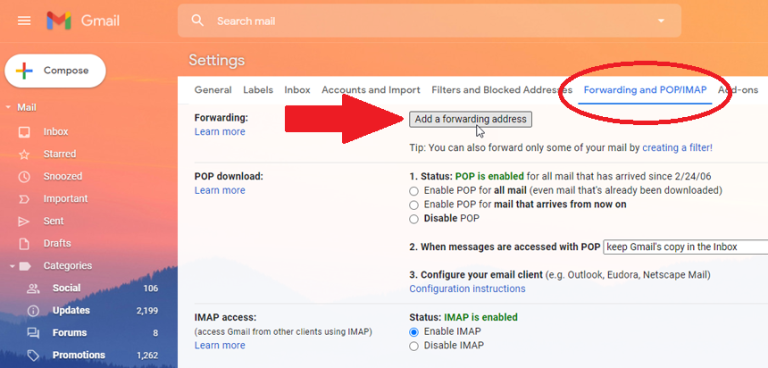
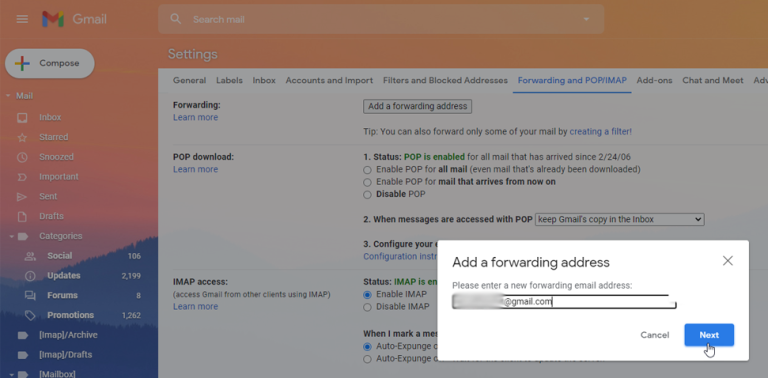
Click the Settings icon in the upper right and select See all settings. At the settings screen, choose the tab for Forwarding and POP/IMAP. Click the Add a forwarding address button and type the address for your new Gmail account in the box. Then click Next.
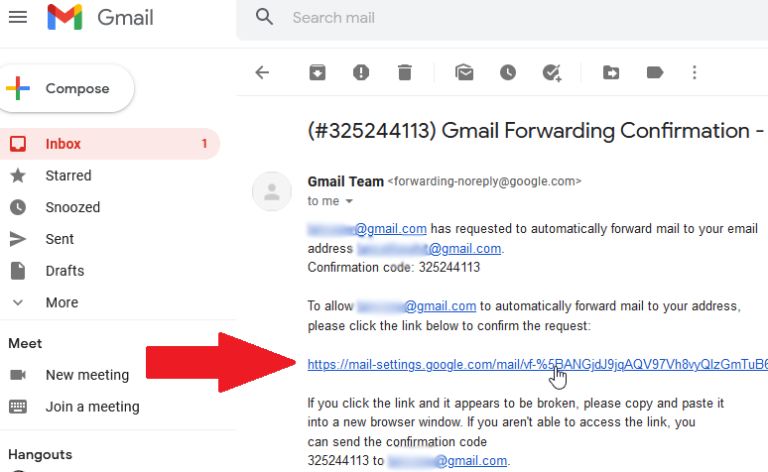
There would be a window will then pop up asking you to confirm the change. Click the Proceed button and a message tells you that a confirmation code has been sent to the other account to verify permission. Sign into your new Gmail account and open the confirmation email. Click the confirmation link and click the Confirm button at the webpage that appears.
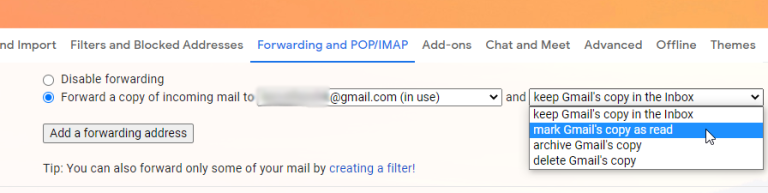
Then, you need to decide what Google should do with the forwarded emails in your old account. Under the Forwarding and POP/IMAP section of your old account’s Settings screen, click the Forward a copy of incoming mail button. Open the drop-down menu next to it and select one of the four options:
1 Keep the copy in the inbox
2 Mark the copy as read
3 Archive the copy
4 Delete the copy
To select the option 1 or 2 to start. After you know the forwarding is working correctly, you can always return to this menu and select option 3 or 4. When done, click the Save Changes button at the bottom. Now all you have to do is test that email forwarding works.
Send Old Emails
After forwarding is set up, you are still able to send emails from your old account.
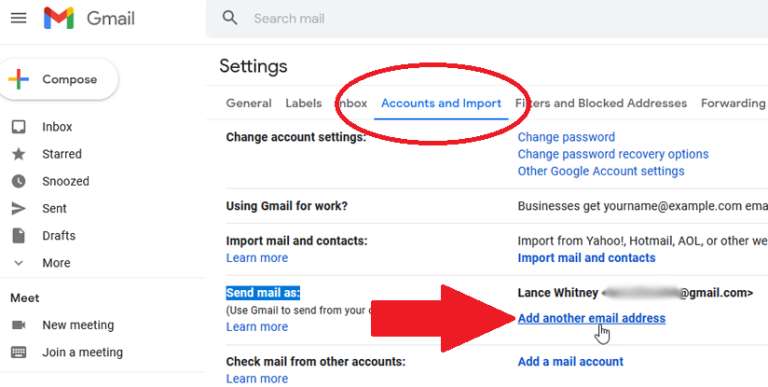
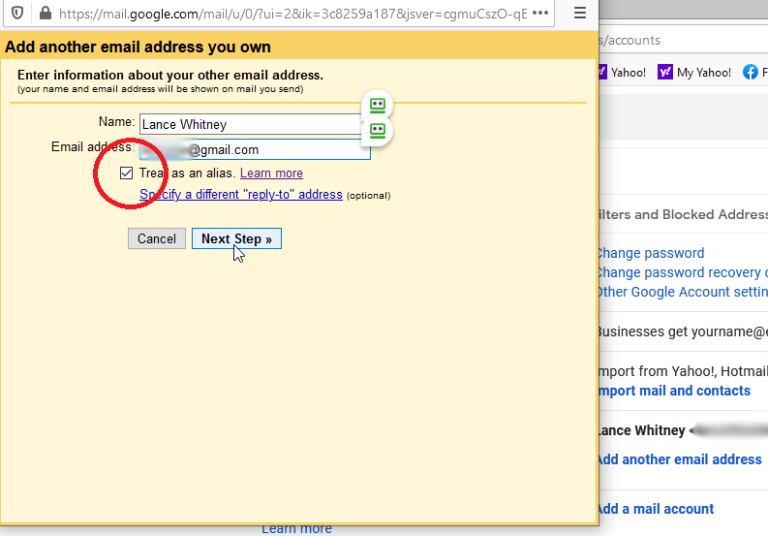
In the new Gmail account, go to Settings > Accounts and Import. In the section for Send mail as, click the Add another email address link.
When you see the pop-up window, type your old email address in the field for Email address. Leave the option Treat as an alias checked. Click the button for Next Step. Click the Send Verification button.
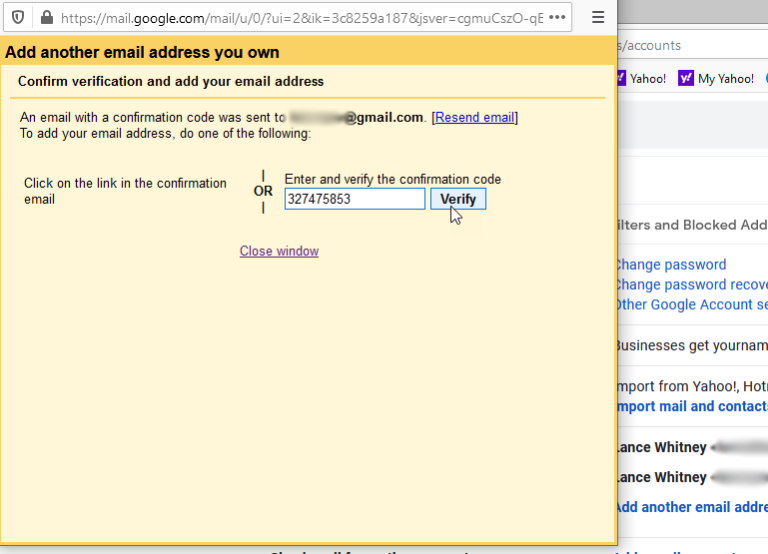
Sign into your old Gmail account. Copy the number in the verification email, paste it into the appropriate field in the pop-up window, and then click Verify.
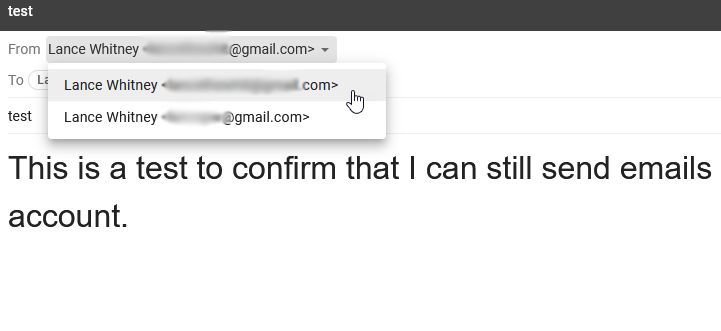
The next time you need to send an email, click the From field and you can choose either your old account or your new account as the sender address.
To Input Emails and Contacts
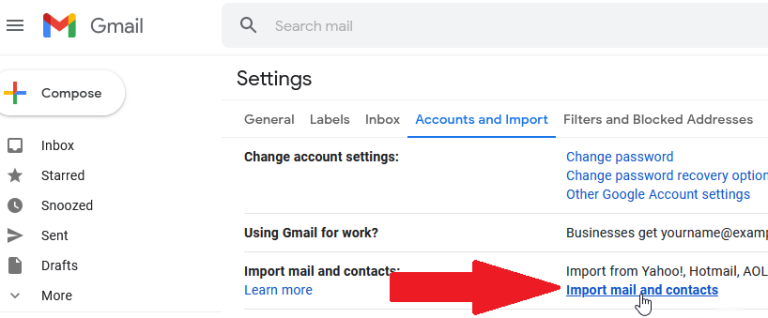
Next, you may want to import all the saved emails and contacts from your old Gmail account to the new one. You can take care of both in one shot by going to Settings > Accounts and Import in your new account. Click the Import mail and contacts link.
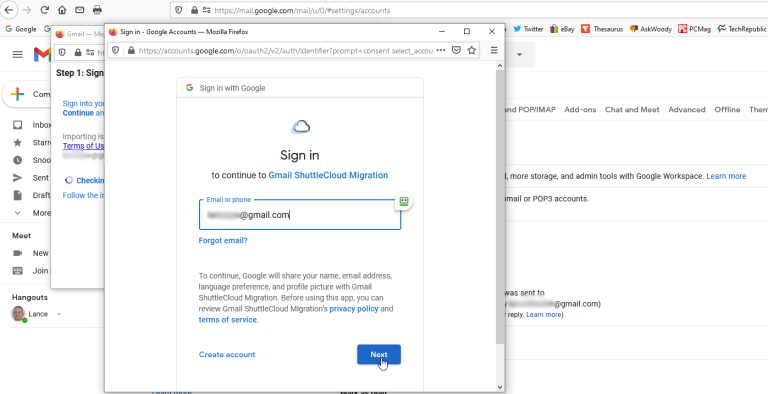
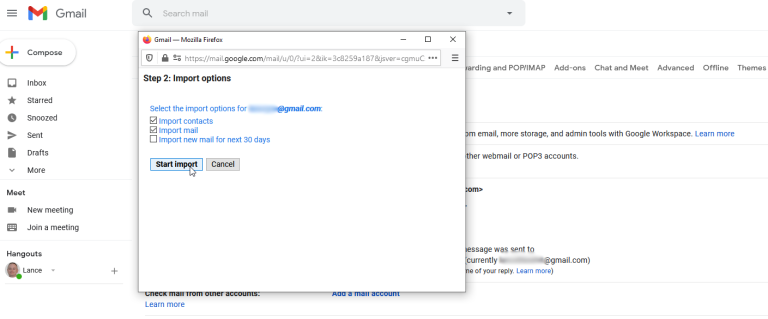
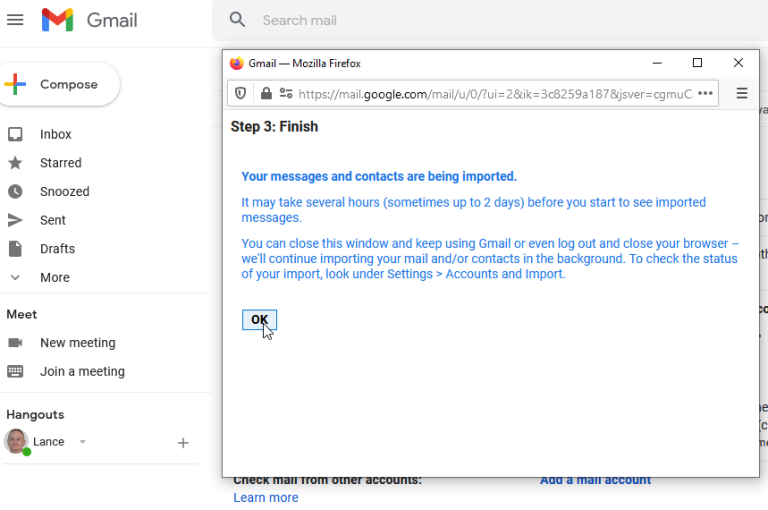
The other window should then present your import options. By default, the process will import your contacts, mail, and new mail for the next 30 days. You can uncheck any of these options. For example, if you’ve already enabled email forwarding, uncheck the option to import new mail for next 30 days. When ready, click the Start import button.
How to import calendar
Eventually, you may expect to add the calendar appointments and events from your old account to the new one. To do this, sign into your old account. Click the Google Apps icon and select Calendar. At the calendar screen, click the Settings icon and select Settings.

Go back to your new Google account and open the calendar settings. Click Import & export, then click the Select file from your computer button. Select the exported ICS file and click the Import button.
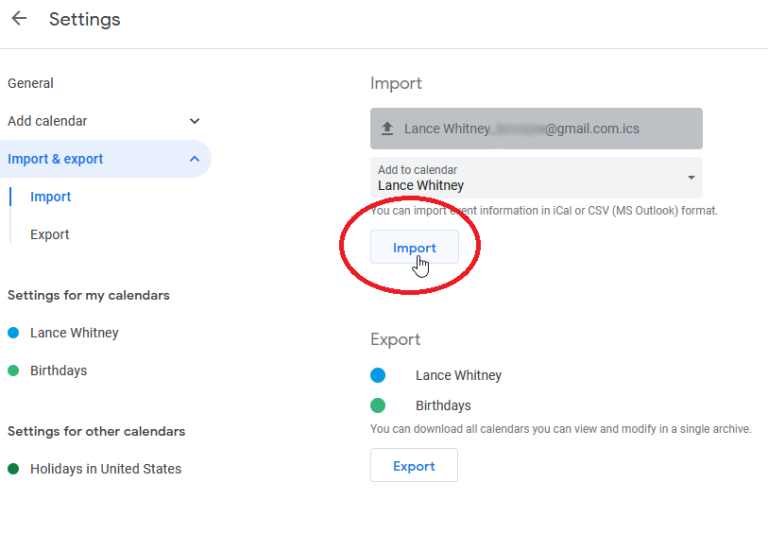
While the calendar is being imported, the Import button will be grayed out. Wait until the button becomes available again, then check the calendar in your new account to confirm that all the appointments and events have been imported.