Hey, friends, as we all know, the Quick Actions are a handy feature that allows users to perform tasks such as markup, image rotation, create PDF, etc by simply right-clicking on a file. However, you’re not just limited to the default set of Quick Actions and you can create a custom Quick Action that does a lot more, from scratch.
How to create the custom quick actions in macOS
Here, we will be creating a custom Quick Action to instantly resize an image stored on your Mac. This will give you an idea of how you can configure your own Quick Action to meet your workflow requirements, using the tools within Automator.
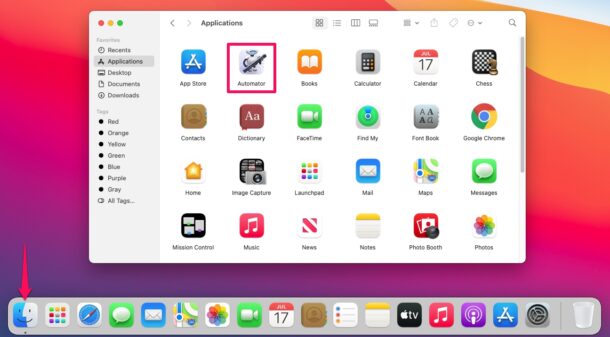
1. Just click on the Finder icon located in the Dock and head over to “Applications” from the left pane. Now, launch Automator. Alternatively, you can open Automator using Spotlight search by pressing Command + Space bar.
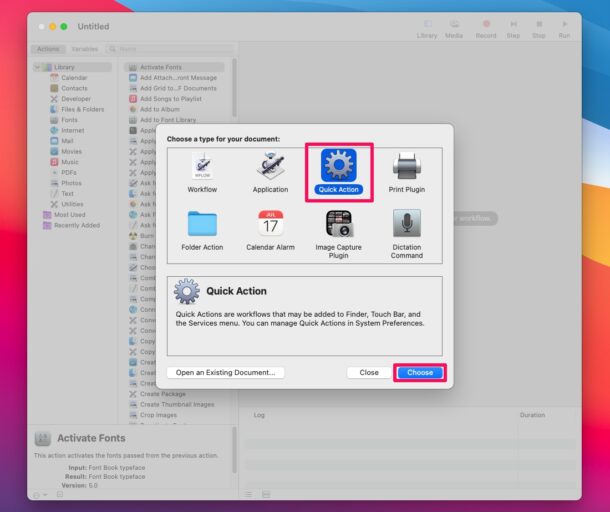
2.Once the app launches, it will also open a pop-up window to let you choose a document type. Choose Quick Action to proceed.
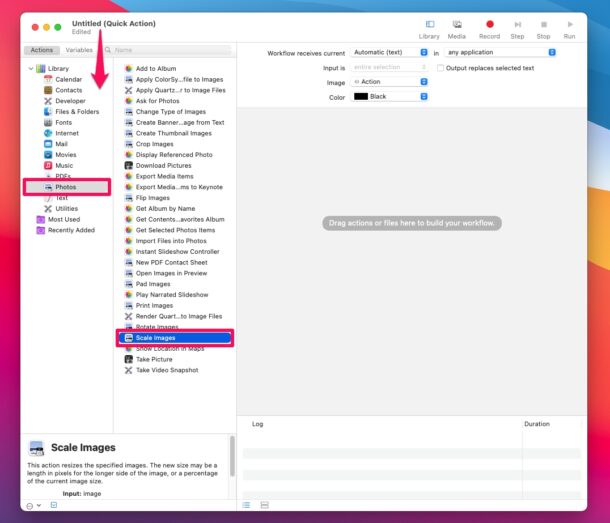
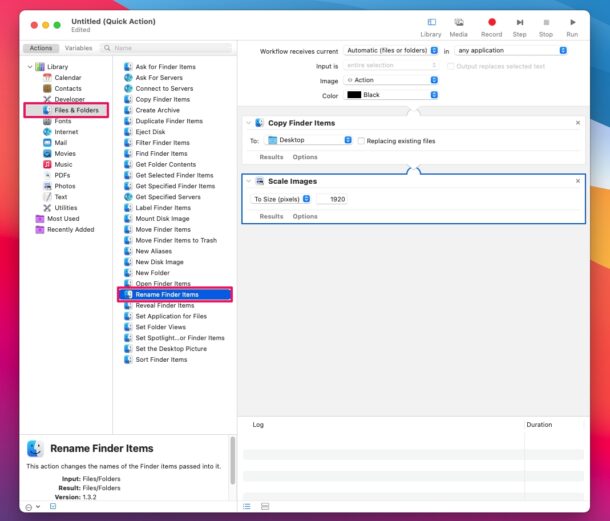
3.Now, you’ll notice a vast library of actions in the sidebar. Select “Photos” under Library and double-click on Scale Images actions, as shown here.
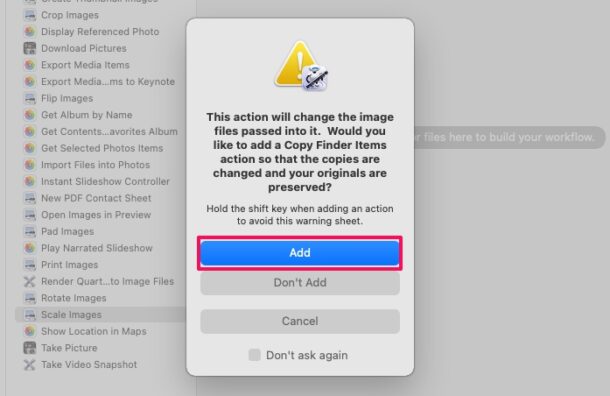
4.You’ll be prompted to add a Copy Finder Items action so that your original image files aren’t overwritten while resizing. Click on Add and continue.
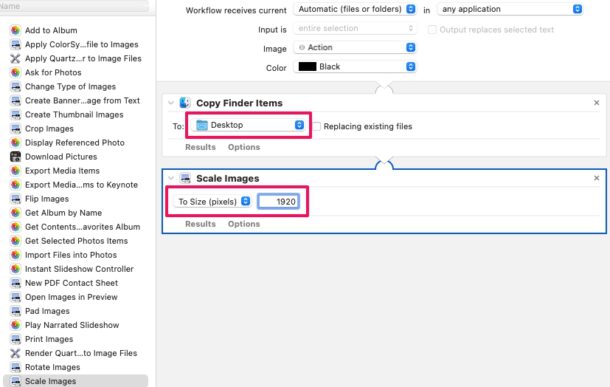
5.On the right pane, you’ll see two actions. You can choose a desired location for Copy Finder Items. Note that this is the location where the resized images will be stored. Under Copy Finder Items, you’ll see the Scale Images action. Type in a preferred size or pixel value to set the resolution for the resized image. For example, type 1920 if you want a Full HD scaled image.
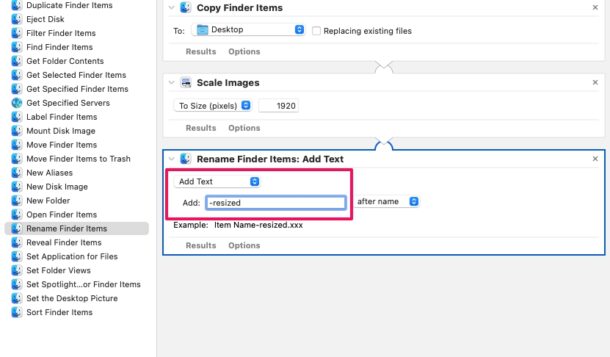
6.Next, choose Files & Folders under Library and double-click on the Rename Finder Items action.
7.Make sure you’ve selected “Add Text” instead of “Add Date” and then type in the text you want to add to the renamed image files. In this instance, we’ve used “-resized” which means a file with the name IMG.jpg will be renamed to IMG-resized.jpg.
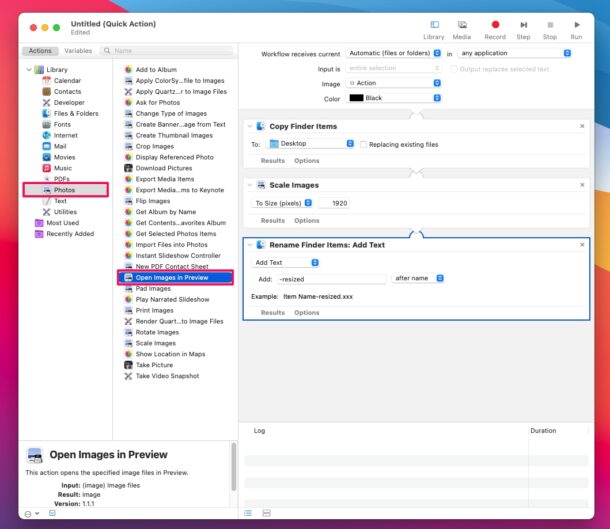
8.Then, just choose “Photos” under Library and double-click on the “Open Images in Preview” action. This will automatically open the resized image as a preview when you use the Quick Action.
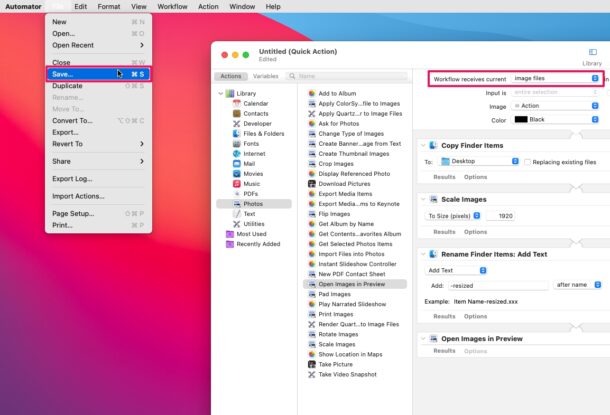
9.At the top of the Automator app, you’ll notice an option called “Workflow receives current”. Set this to “Image files” as shown below. Now, it’s time to save this Quick Action. Click on File from the menu bar and choose “Save” from the dropdown menu.
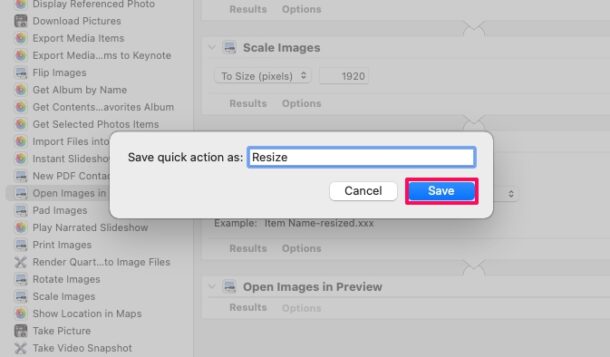
10.Remember to give a suitable name for the Quick Action such as “Resize” in this instance, and click on “Save” to make the changes.
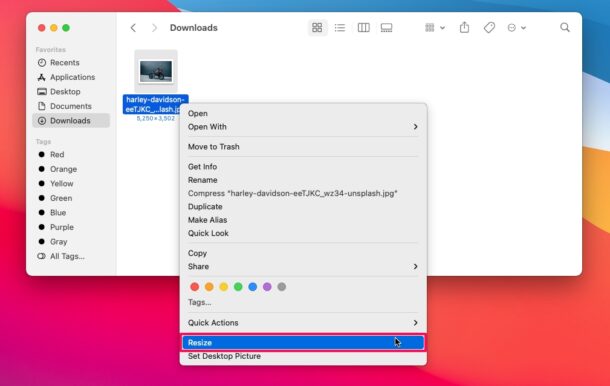
11.Just launch Finder and find the image file you want to resize. Right-click or Control-click on the image file and choose “Resize” as shown in the screenshot below. if you can’t find the Resize option here, you can click on “Quick Actions” in the same menu to access it.