
First:
How to take a screenshot on an iPad using the Top and Home or Volume up buttons
Step 1: Locate the Home and Top (Power) buttons. The Home button is located directly below your iPad’s display and is the only button on the front side of the iPad. The Top button, on the other hand, is the oval-shaped button atop the iPad in the right-hand corner. If you have a new 2020 iPad Pro, then you need to find the Volume Up button, since there is no Home button.
Step 2: Press and hold the Top button when viewing the screen you want to capture, then tap the Home button and release both. For the 2020 iPad Pro, press and hold the Top button and then tap the Volume up button and release both. Your iPad screen will then flash momentarily, and you’ll also hear a faint shutter noise, assuming your device isn’t in silent mode.
Step 3: Once captured, your iPad will automatically save the screenshot to your camera roll in the Photos app. Tap the Photos app as you would normally — the app icon resembles a multicolored flower — and swipe to the bottom of the screen to view your recently captured screenshot.
Second:
How to take a screenshot on an iPad using AssistiveTouch
AssistiveTouch, part of the iOS and iPad OS accessibility roster, offers an on-screen menu that enables you to trigger various actions that usually require button combinations, and one of those is taking a screenshot. If you’re reading this and you are unable to press multiple buttons at the same time, then taking a screenshot with AssistiveTouch is the way to go.
The first thing you have to do is to turn AssistiveTouch on. To do so, follow the steps below.
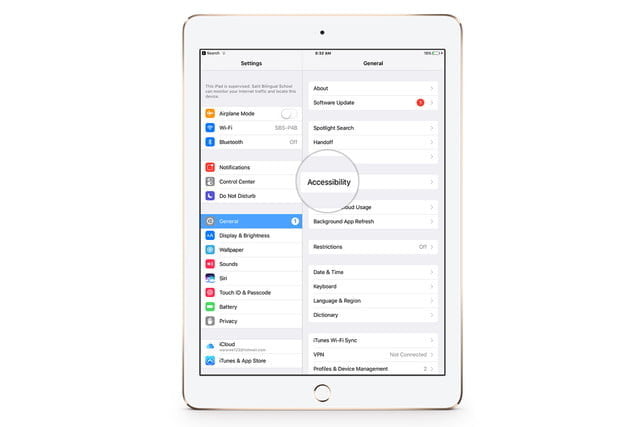
Step 1: Go to Settings > General > Accessibility > AssistiveTouch. (For iPadOS 14, the sequence is Settings > Accessibility > Touch > AssistiveTouch.)
Step 2: Make sure AssistiveTouch is toggled on at the top of the menu.
Now that AssistiveTouch is active, we can start taking screenshots using the AssistiveTouch menu.