Apple’s AirTag body is quite small and lightweight, users will be able to use AirTag key ring, hanging ring and other AirTag accessories to avoid the loss of valuables, of course, you can also put the AirTag directly into the backpack storage bag.
However, for people who want to put AirTag in a wallet, the original 8mm body of AirTag may be too thick to fit in the wallet.
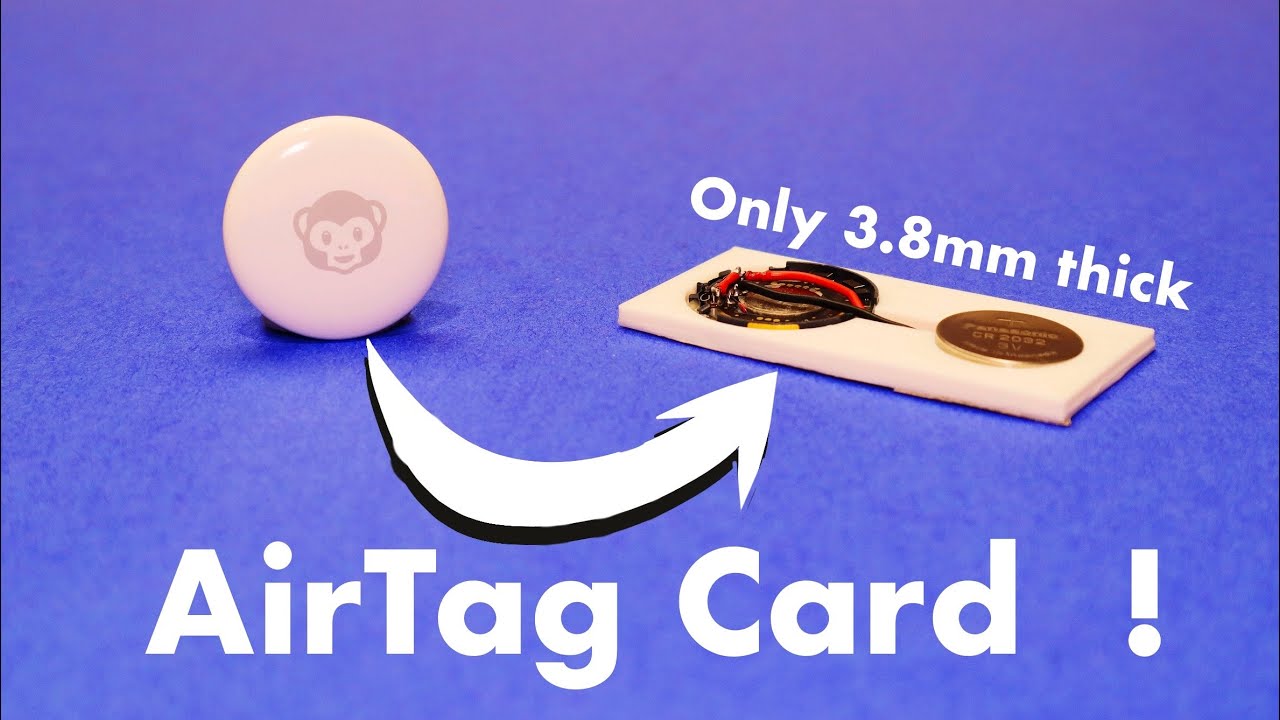
Recently, some users disassembled the AirTag by themselves. In addition to removing the motherboard from the case, the AirTag was finally successfully transplanted to a 3D printing card and it still works normally. It’s amazing!
Andrew Ngai wanted to put the AirTag into the wallet, but he couldn’t help but the 8mm thickness of the AirTag would be too thick to be put into the wallet, so he decided to make his own AirTag accessories more suitable for him.
He wanted to try to make AirTag migrate from the original case to thinner items such as cards.
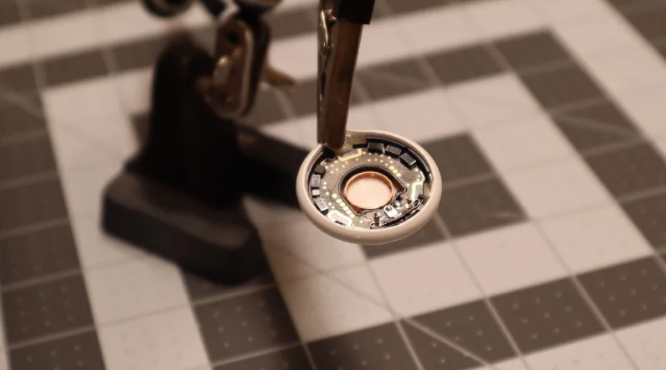
It took Andrew Ngai for a long time to finally dismantle AirTag layer by layer. It is not easy to know this process, but he successfully completed the dismantling with only some tools and patience.
For example, it is quite difficult to remove the motherboard inside the AirTag. You need to use a hot air blower to heat the AirTag to about 65°C before you can take the AirTag motherboard out of the plastic case.
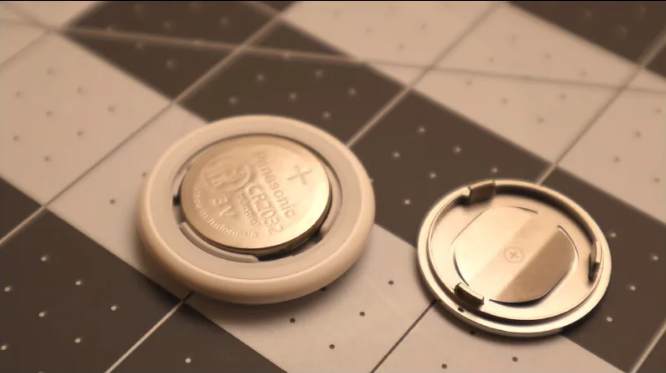
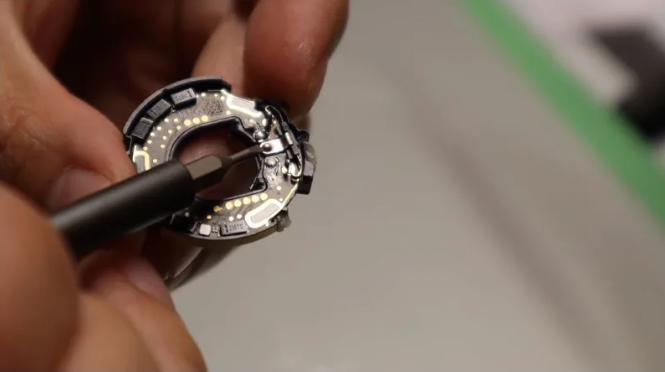
Finally, the AirTag’s motherboard was removed, but the biggest difficulty in making the AirTag thinner is how to reinstall the CR2023 button battery.
AirTag uses Panasonic’s CR2032 button battery, and the official state stated that the battery can be used for about 1 year.
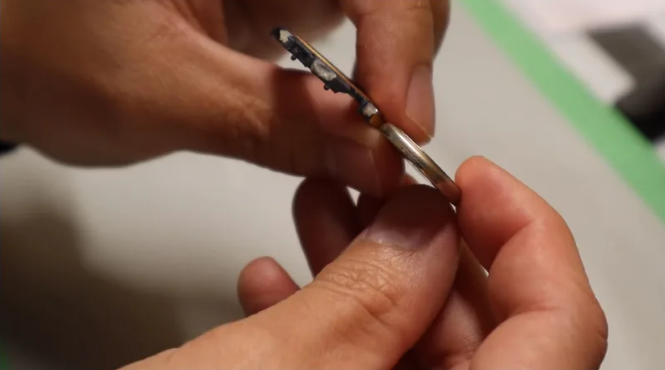
According to his calculations, the CR2032 battery has a thickness of 3.2mm. In order to reduce the overall thickness, the battery and the motherboard must be arranged horizontally.
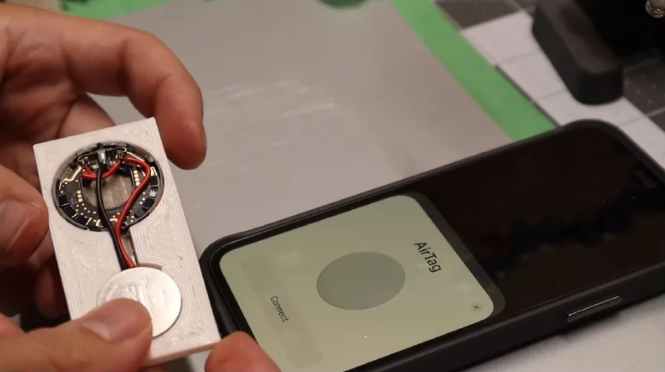
So he chose to use 3D printing to make a holder for AirTag and battery. This holder is only the size of a card to hold AirTag motherboard and CR2032 battery, and it is connected to the power supply through a wire.
It can be found that the following picture will pop up a quick connection window when it is close to the iPhone, which also means that the AirTag transplantation is close to success, and it is only necessary to actually place it in the daily necessities to find this step.
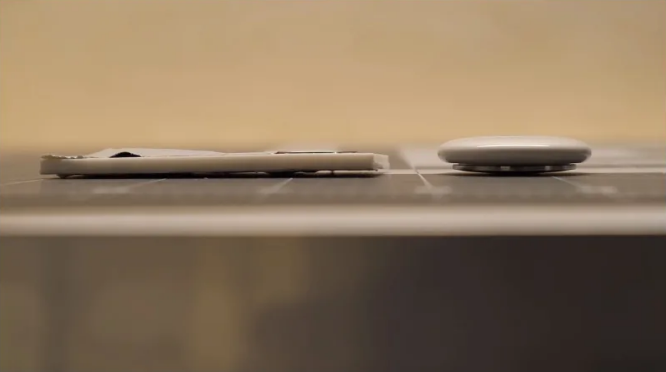
Comparing the physical thickness of the AirTag card he made with 3D printing is 3.8mm, the thickness of the transplanted AirTag card is only less than half of the original AirTag:
In the end, he also succeeded in putting the DIY AirTag card directly into the wallet like a credit card, and tracking the location of the AirTag can also be found successfully, which also means that the AirTag transplantation operation was quite successful this time, which is really impressive!
But even if this is very powerful, I still don’t recommend that you learn to do it later. After all, the parts are bound to be damaged during the disassembly process, and may even cause the result of no warranty and no waterproof.