Hey, man, do you wanna just update the software on your HomePod or HomePod mini to the latest version of HomePod OS software? Keeping HomePod updated allows access to new features and functionality, so it’s a good idea to do. Updating a smart speaker may not be a familiar process to many users, but as you’d probably expect, Apple makes the update process pretty easy and simple.
The following steps are applicable to both the HomePod and HomePod mini models. Basically, we’ll be making use of the Home app to update the software. Here’s what you need to do:
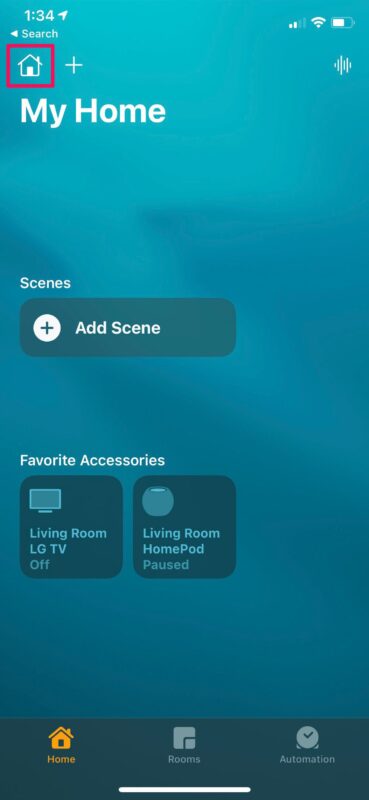
1.Launch the built-in Home app on your iPhone or iPad
2.Remember to make sure you’re in the Home section of the app and tap on the Home icon located at the top-left corner of your screen.
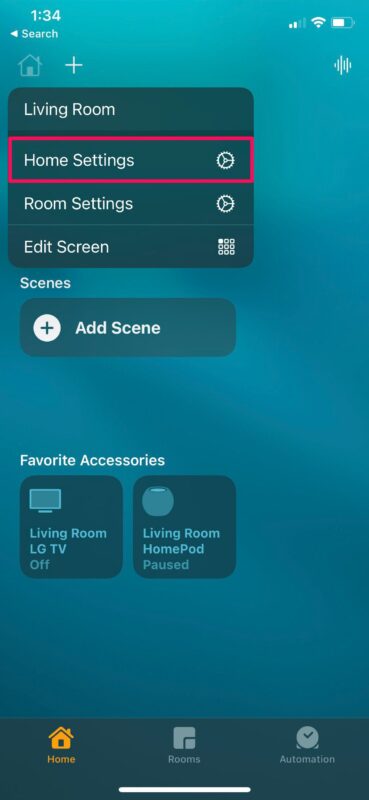
3.Then, choose “Home Settings” from the context menu to proceed.
4.In this menu, scroll down below the Intercom feature and you’ll find the “Software Update” option. Tap on it to continue.

5.Now, the Home app will start checking for any new updates for your HomePod. If it’s on the latest version, you’ll see the following message on your screen. If not, you’ll have the option to download the firmware.
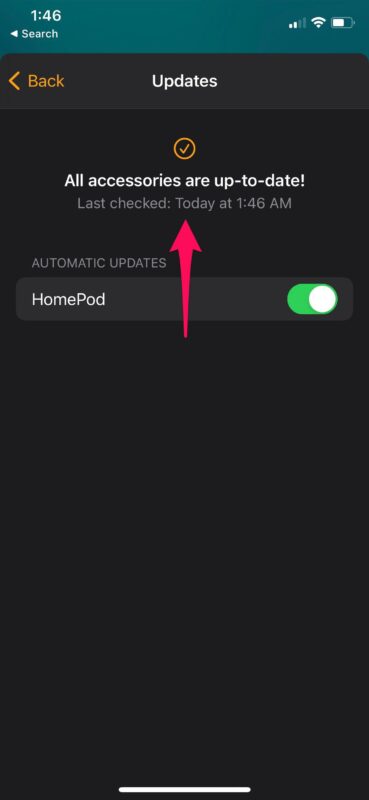
By default, your HomePod checks for new software updates and installs them automatically without you even knowing it. Whereas, the users have the choice to disable automatic updates on the HomePod, if necessary. This setting may be handy if you want better control over the firmware version your HomePod is running.