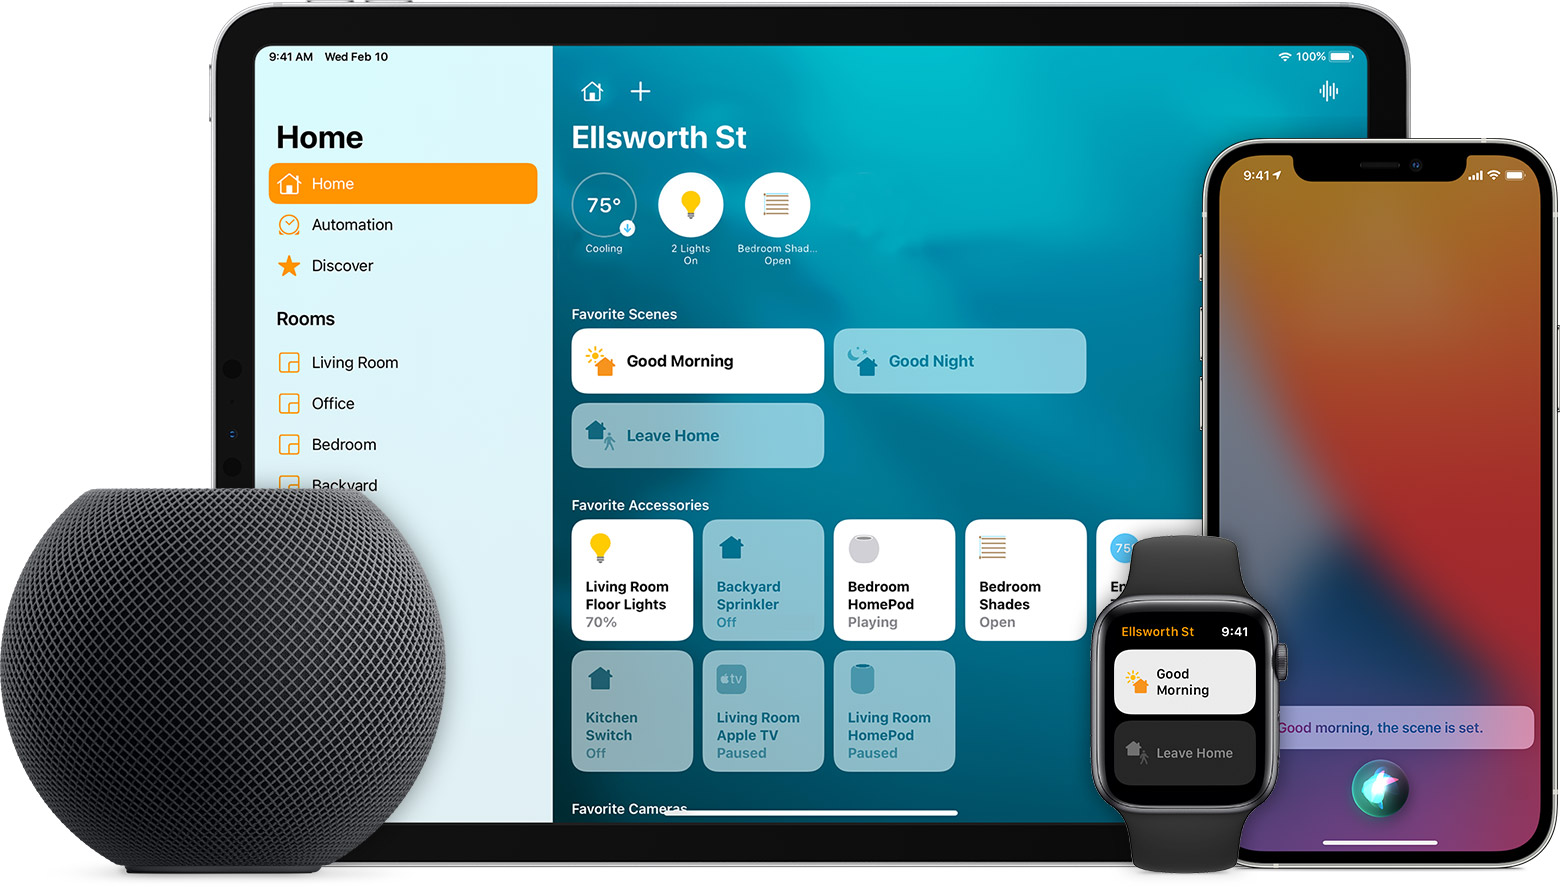
Guys, I bet Apple’s smart home devices are the best in the world. And all of these can be controlled by the Homekit App via all Apple items, like iPhone, iPad and iWatch. So awesome and powerful!
The Apple’s HomeKit App is the easiest way to control your Smart Home devices with your iPhone or Apple Device. There are a lot of powerful use cases for HomeKit and Smart Homes so we’re going to go over some tips and tricks to get the most out of your HomeKit Home.
1.Settings Up Scenes in HomeKit
The best trait of smart homes is the ability to control multiple devices all at once. if you have purchased some smart lights or smart switches to control your lights, you can easily have them all set to a desired brightness and color for different occasions such as Movie night, TV watching, or something like Meditation.
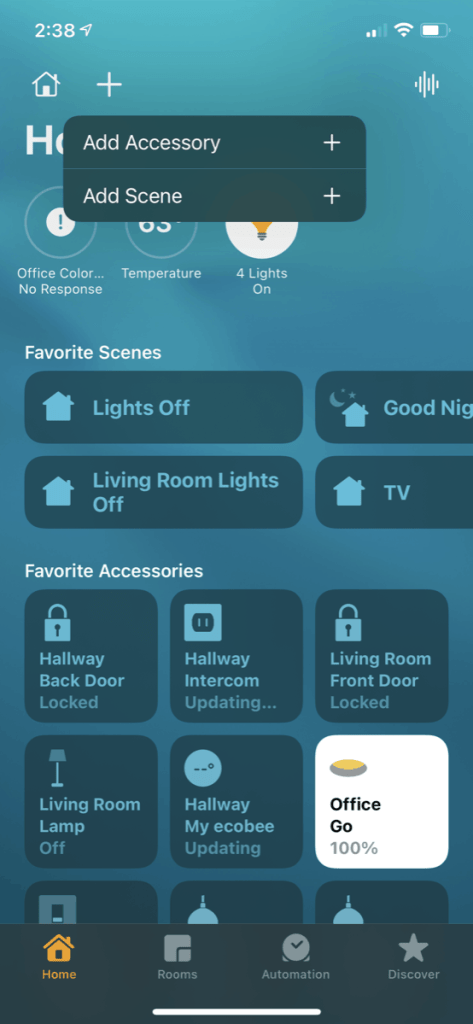
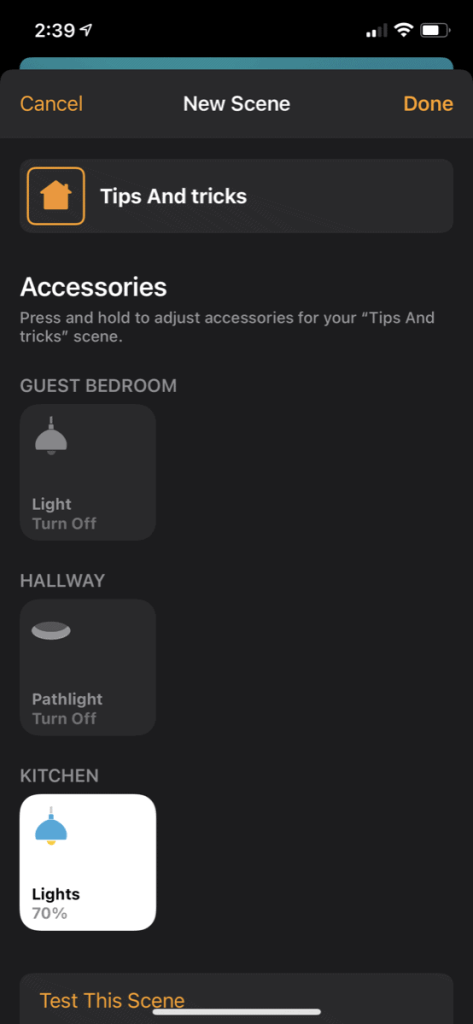
You can see in the Home App, simply tap on the + in the top right corner, and select “Add Scene”. You can name the scene for the occasion, like Movie or Meditation, and then select the devices you want to be in a specific state for this scene, otherwise what isn’t selected will remain in whatever state it is in.
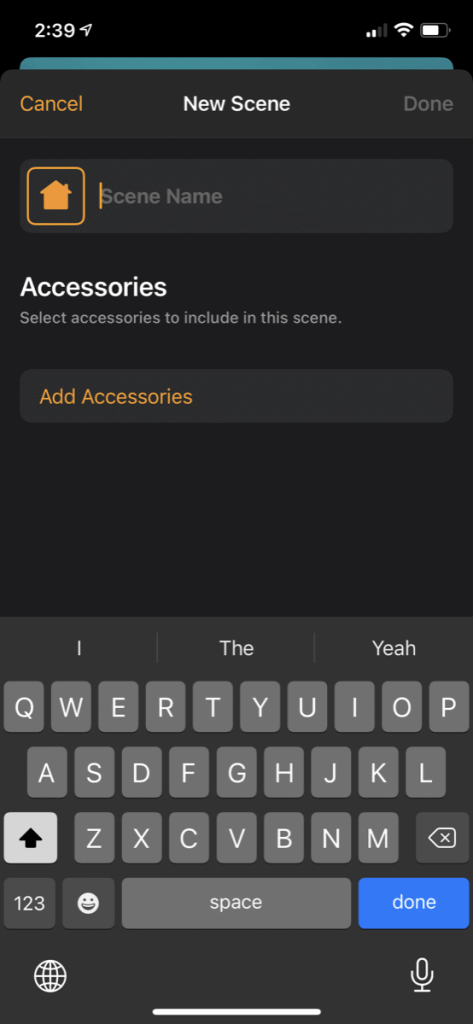
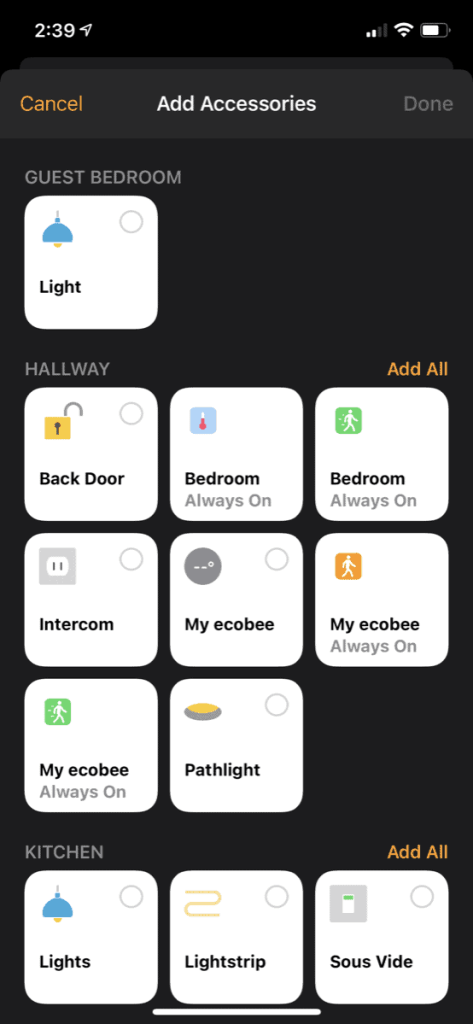

After you have selected your devices, you can then individually select the state of devices. For example you can have your lamps turn off, dim the hallway to 25%, and set the lightstrip to a cool purple color.
You are able to either tell Siri to set that scene by saying “Siri, set the Movie scene” (or whatever the scene is called) and all the selected devices will turn to the predetermined state. You can also select the scene in the Home app, or even in Control Center.
2.Setting Up Automations in HomeKit
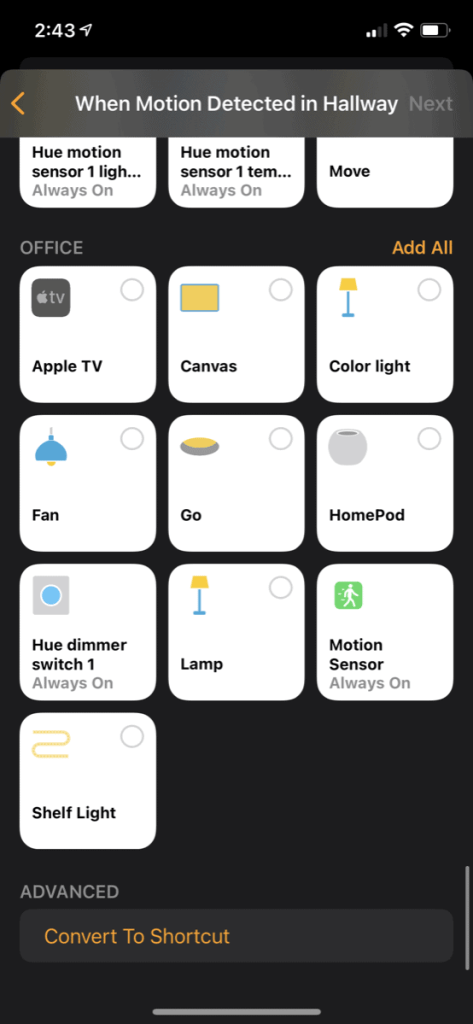
Even more powerful than scenes, are automations. Which basically change the state of your smart home devices based on an automated set of rules. For example you can set it so that all your lights turn off when you leave your home, or your bedroom lights turn on at 8am each morning to wake you up.
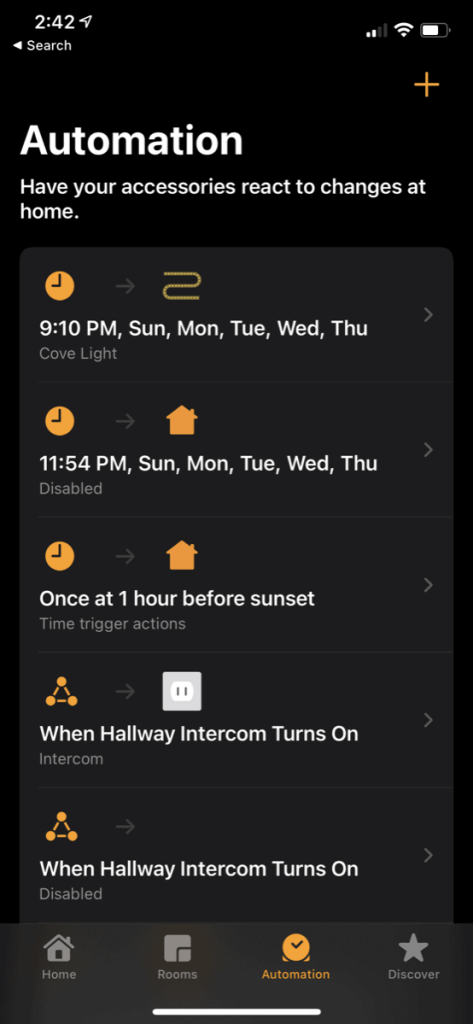
This is set up in a similar way to scenes. Open the Home App and select the Automation tab along the bottom of the screen and then select the + in the top right.
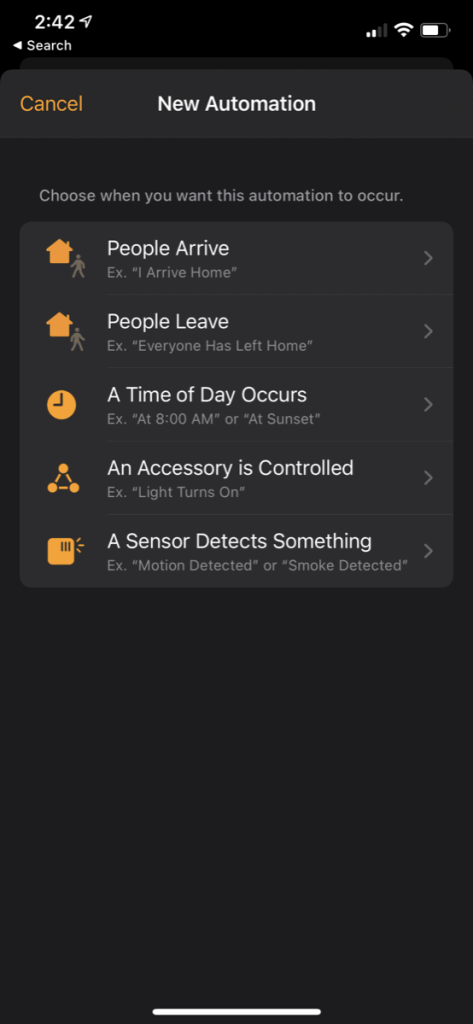
Here you can choose what will trigger the automation, and then you can select that action the automation will take. These automations are what make a Smart Home truly smart.
3.Setting Up Shortcuts in HomeKit
For those that really like to tinker with HomeKit and test the limits, Apple introduced Siri Shortcuts, which allowed Siri to interact with third party apps and do a series of actions. This is similar to a scene, but it can also do things outside of HomeKit.
For example you can tell Siri you are heading home, and it can open up Google Maps with the route to your home, it can set your home Thermostat, and even send a message to someone letting them know.
This can be integrated into your HomeKit automations, so that you don’t need to invoke anything yourself, and you get more actionable options than just smart home control.
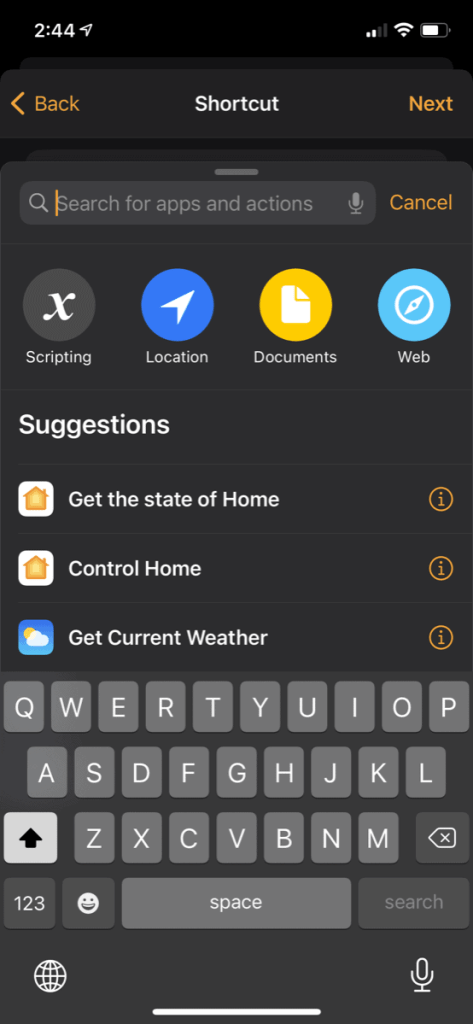
These shortcuts can be made separately in the Shortcuts app, or they can be created by going to Automations, selecting +, choosing the trigger, and then scrolling to the bottom to “Convert To Shortcut”. Now you can have your Apple TV automatically turn on ESPN at a certain time to catch the game, or your child can automatically text you when they heading home from school.
4.Setting Up Groups in HomeKit
If you’re like me, you probably have several smart lights in a single lamp. Because they are separate devices it means you have to turn them on or off separately, which isn’t smart. In HomeKit you can group them together, so that they are controlled together.
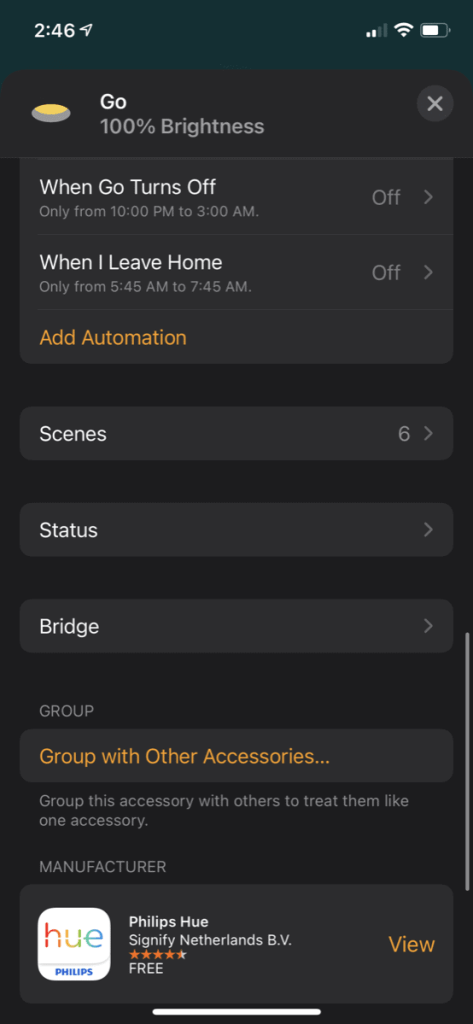
You can do this by going to one of the devices in HomeKit, long pressing it and going to the settings. Once you’re in the settings you can scroll down until you see “Group with Other Accessories…” You select that and then you can select whatever other device you want to group it with and give that new grouped device a name.
This is the easiest way to control and address devices that would typically be controlled together like various light fixtures.
5.Setting Up Zones in HomeKit
We’re all familiar with rooms and how to separate device into different rooms. Zones are essentially a group of rooms, based on whatever criteria you want. For instance you could get a whole basement that may include multiple rooms. You are able to even group all of the bedrooms together into a single zone.
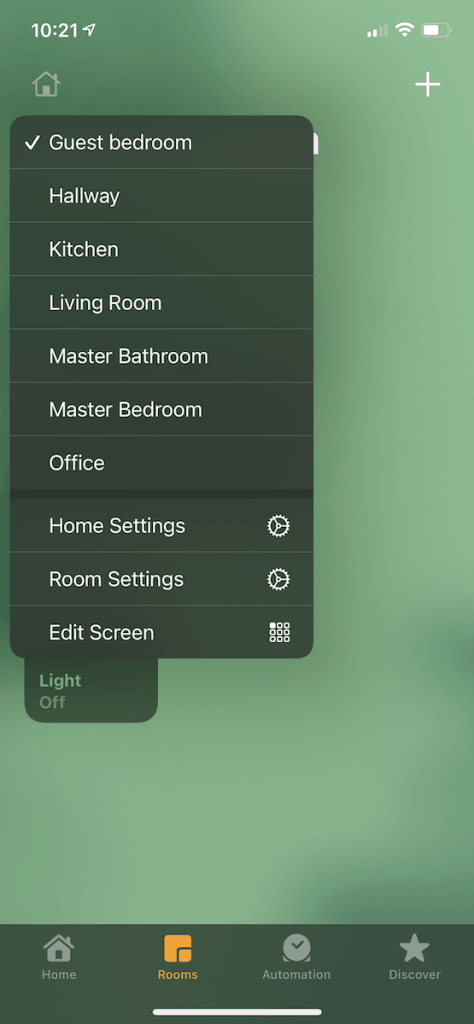
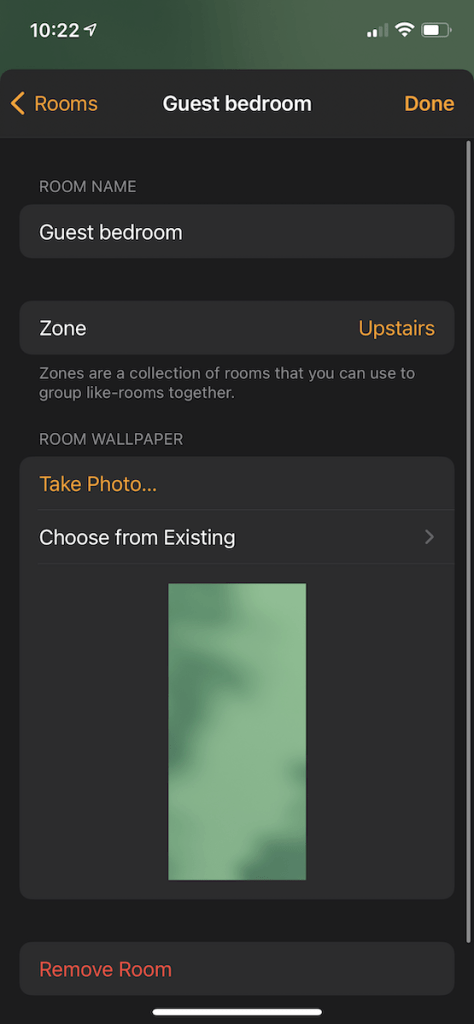
The reason for this is to be able to address multiple rooms all at once. To create a zone, open the Home app and tap on the Home icon in the top right and go to “Room Settings”. You should see a Zone setting right at the top, and there you can create a new zone and assign different rooms to it.
6.Setting Up A HomeKit Hub
HomeKit is the most easiest way to control your smart home devices from your iPhone, but if you want to be able to control them with Siri or from outside your home, you will need a HomeKit Hub. This allows all the devices to securely communicate with the internet, allowing you external access.
There are three devices that can work as HomeKit Hubs. iPads, Apple TVs, and also HomePods.
Provided you have any of these devices, you can go into their settings and scroll down to “Home”, and there you can enable that device as a Home Hub. If you happen to have multiple devices, the first you choose will be the primary hub, and the rest will serve as range extenders for all your HomeKit devices so that they are always reachable.
After this is complete, you can see it in your Home app, under “Home Settings” and “Hubs and Bridges”. Now you should be able to successfully use Siri or LTE / 5G to control your Smart Home.